Monday 30 January 2023

Stamping Bella Dino Trio


Hi Lovelies....

Today I'm sharing my last sneak peek for the new release over at Stamping Bella and there is definitely a pre-historic feel to the stamps this time.  There's lots of Oddballs - then there's the cute dinosaurs!

I've used this Dino Trio for my card - adding them to a trio of windows.  


Card Info:
Die - Mama Elephant Trio Window Cover
Stencil - Tim Holtz Burlap
Distress Ink - Old Paper
Colouring - Copics
Dinos - W0/1/3/4
Other colours - R81/83 V15 C0/1

Hope you like my Dino make... you can get lots more inspiration for the release on the Stamping Bella Blog and also on the Sistahood Facebook Page.

The release will be available from 5 am UK time tomorrow (midnight US time).

Happy Crafting!

Sunday 29 January 2023

Stamping Bella New Release - Gnomes!!


Hi Lovelies...

Yayyy... the GNOMES are back!  And I'm here with sneak peeks of the fabulous new gnome release from Stamping Bella - available from Tuesday 31 January..  Are you sitting comfortably and do you have your shopping list handy?  Then I'll begin!

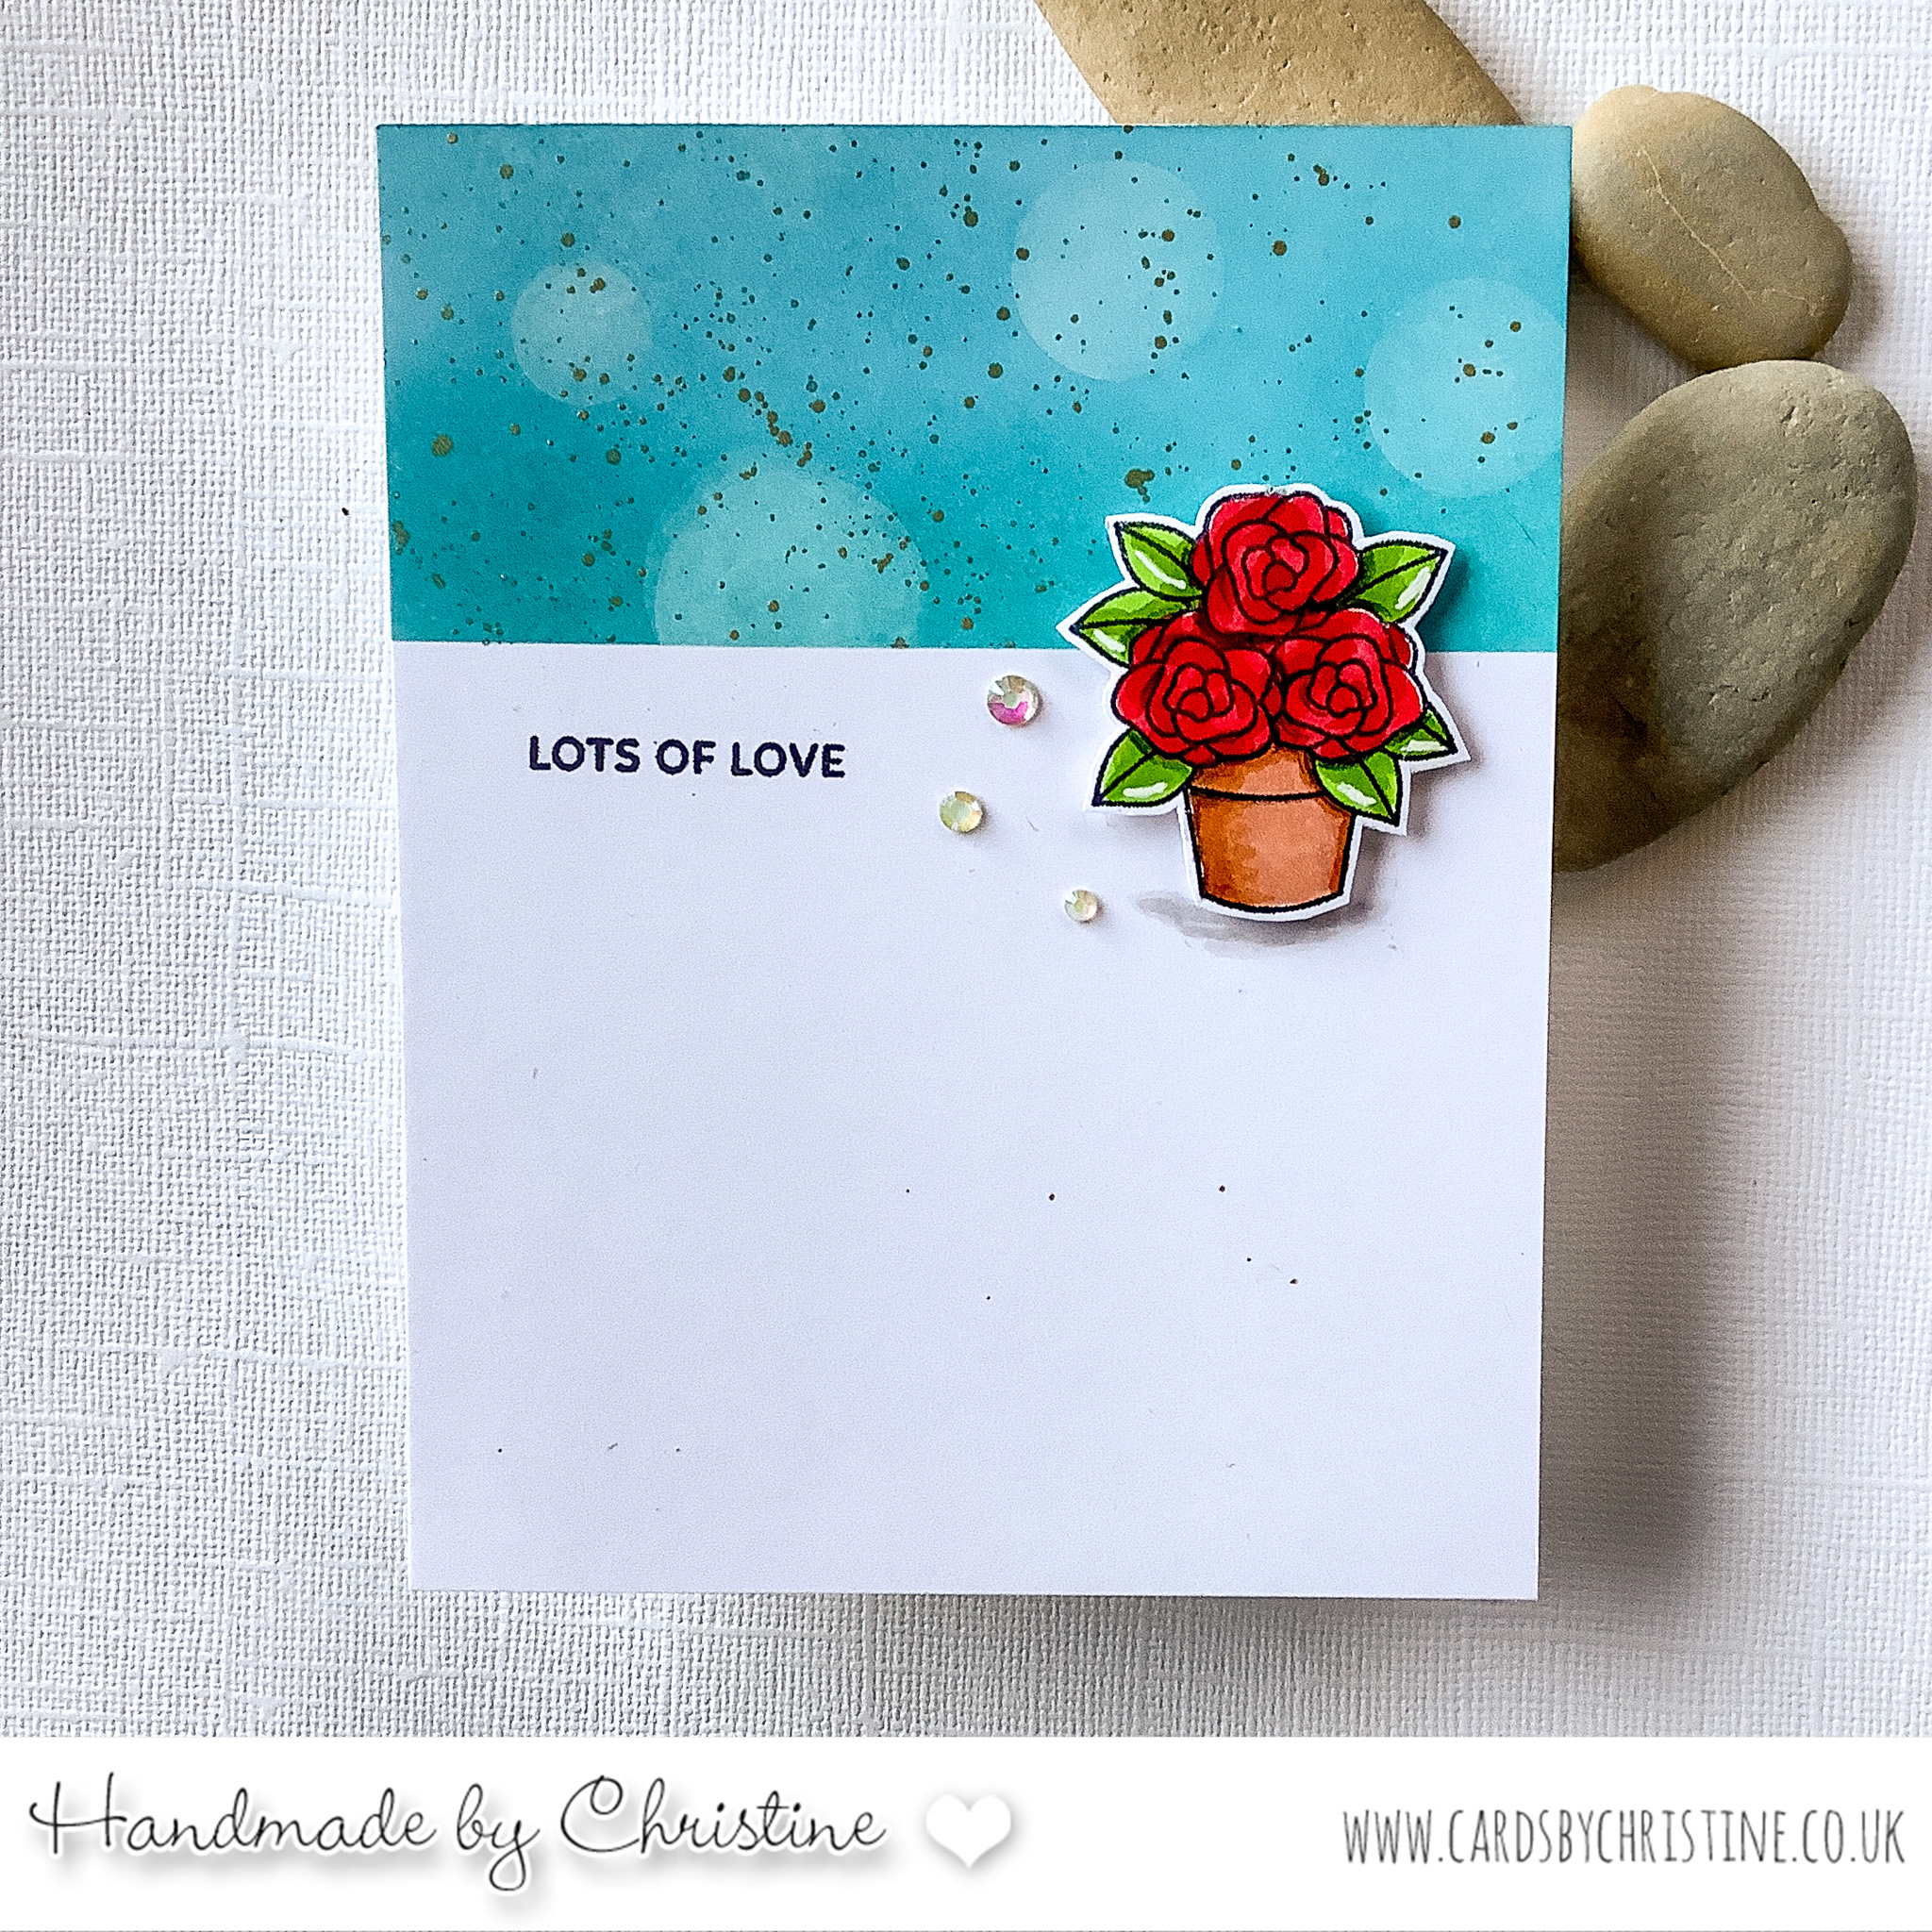
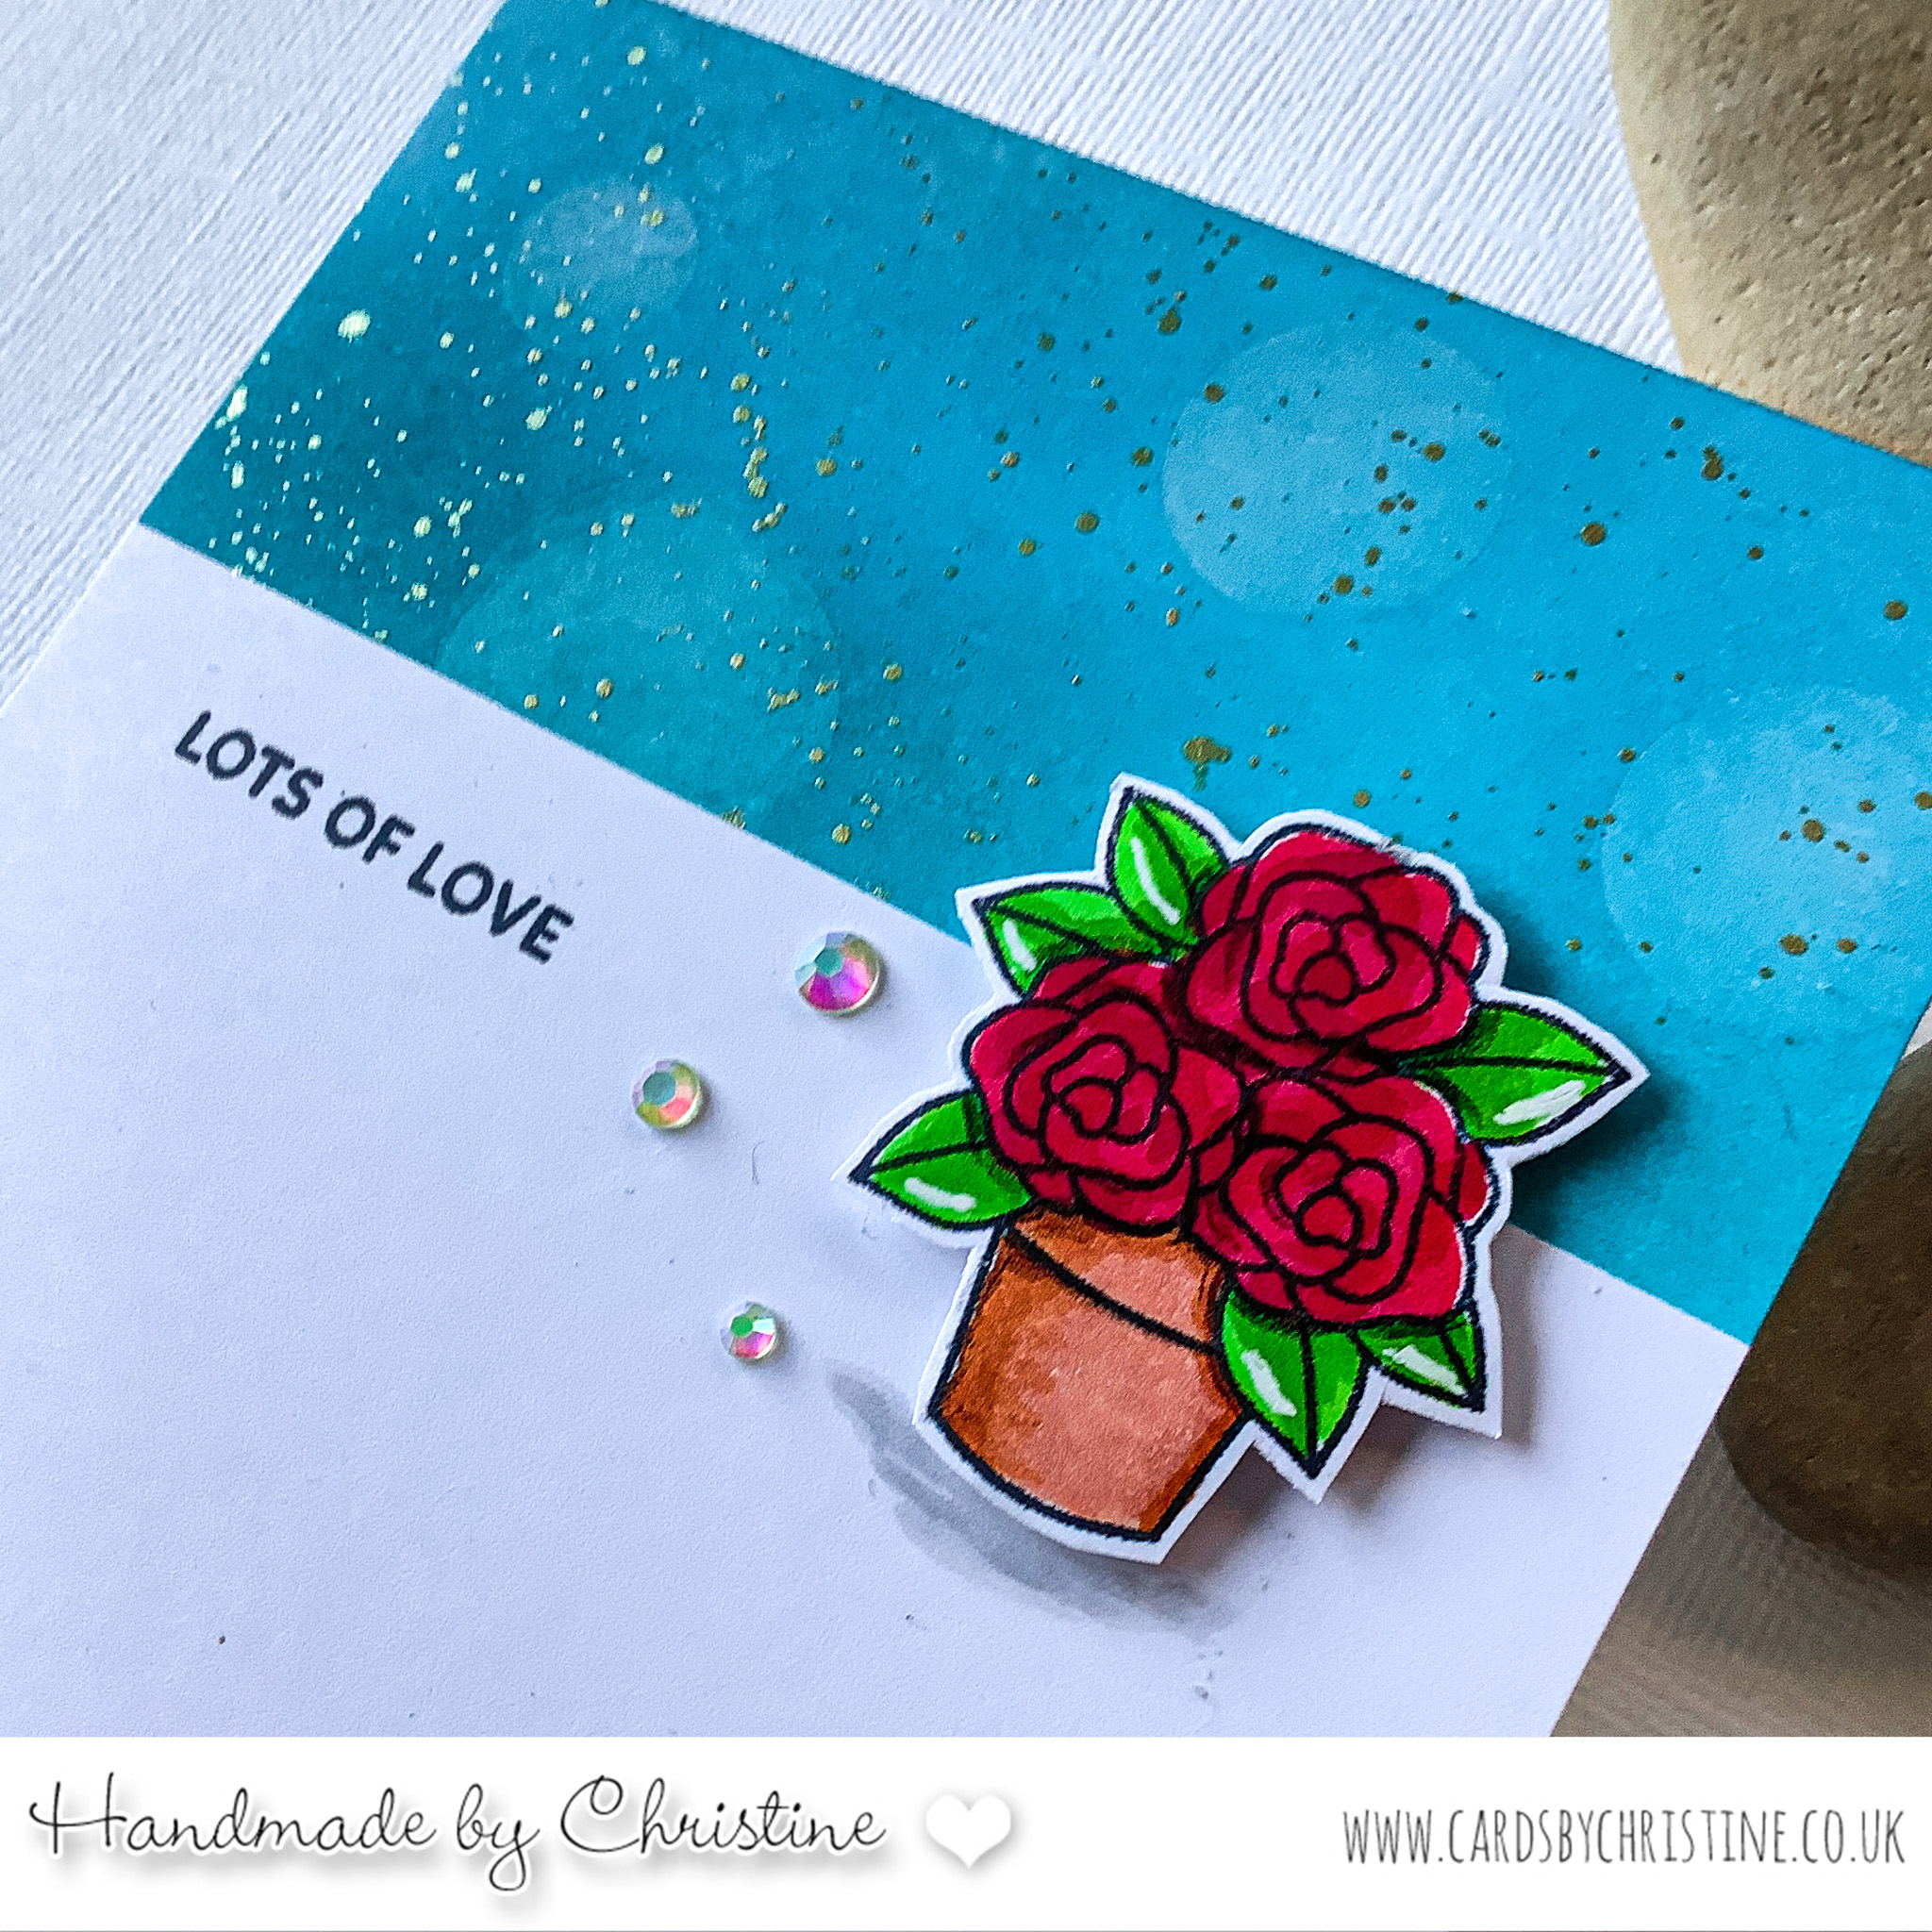
Firstly, we have the Gnome Artist.. he's painted all those stripes and is working up to a masterpiece!


Card Info:
Sentiment - Stamping Bella Work Life Sentiment Set
Colouring - Copics
Skin - E000/00 R01
Hat - R24/27/46 E57
Beard - T0/1/2
Outfit - B21/23/24
Brush E41/43
Palette Colours - R46 B26 BG13 YR04 V15


Next we have our Gnome Mermaid .. she's under the sea blowing lots of bubbles!


Card Info:
Stencil - Honey Bee Layered Waves
Colouring - Copics
Skin - as above
Tail and Top - BG10/11/32/24/72
Hair - YG61/65
Flower - R81/83/85
Gems


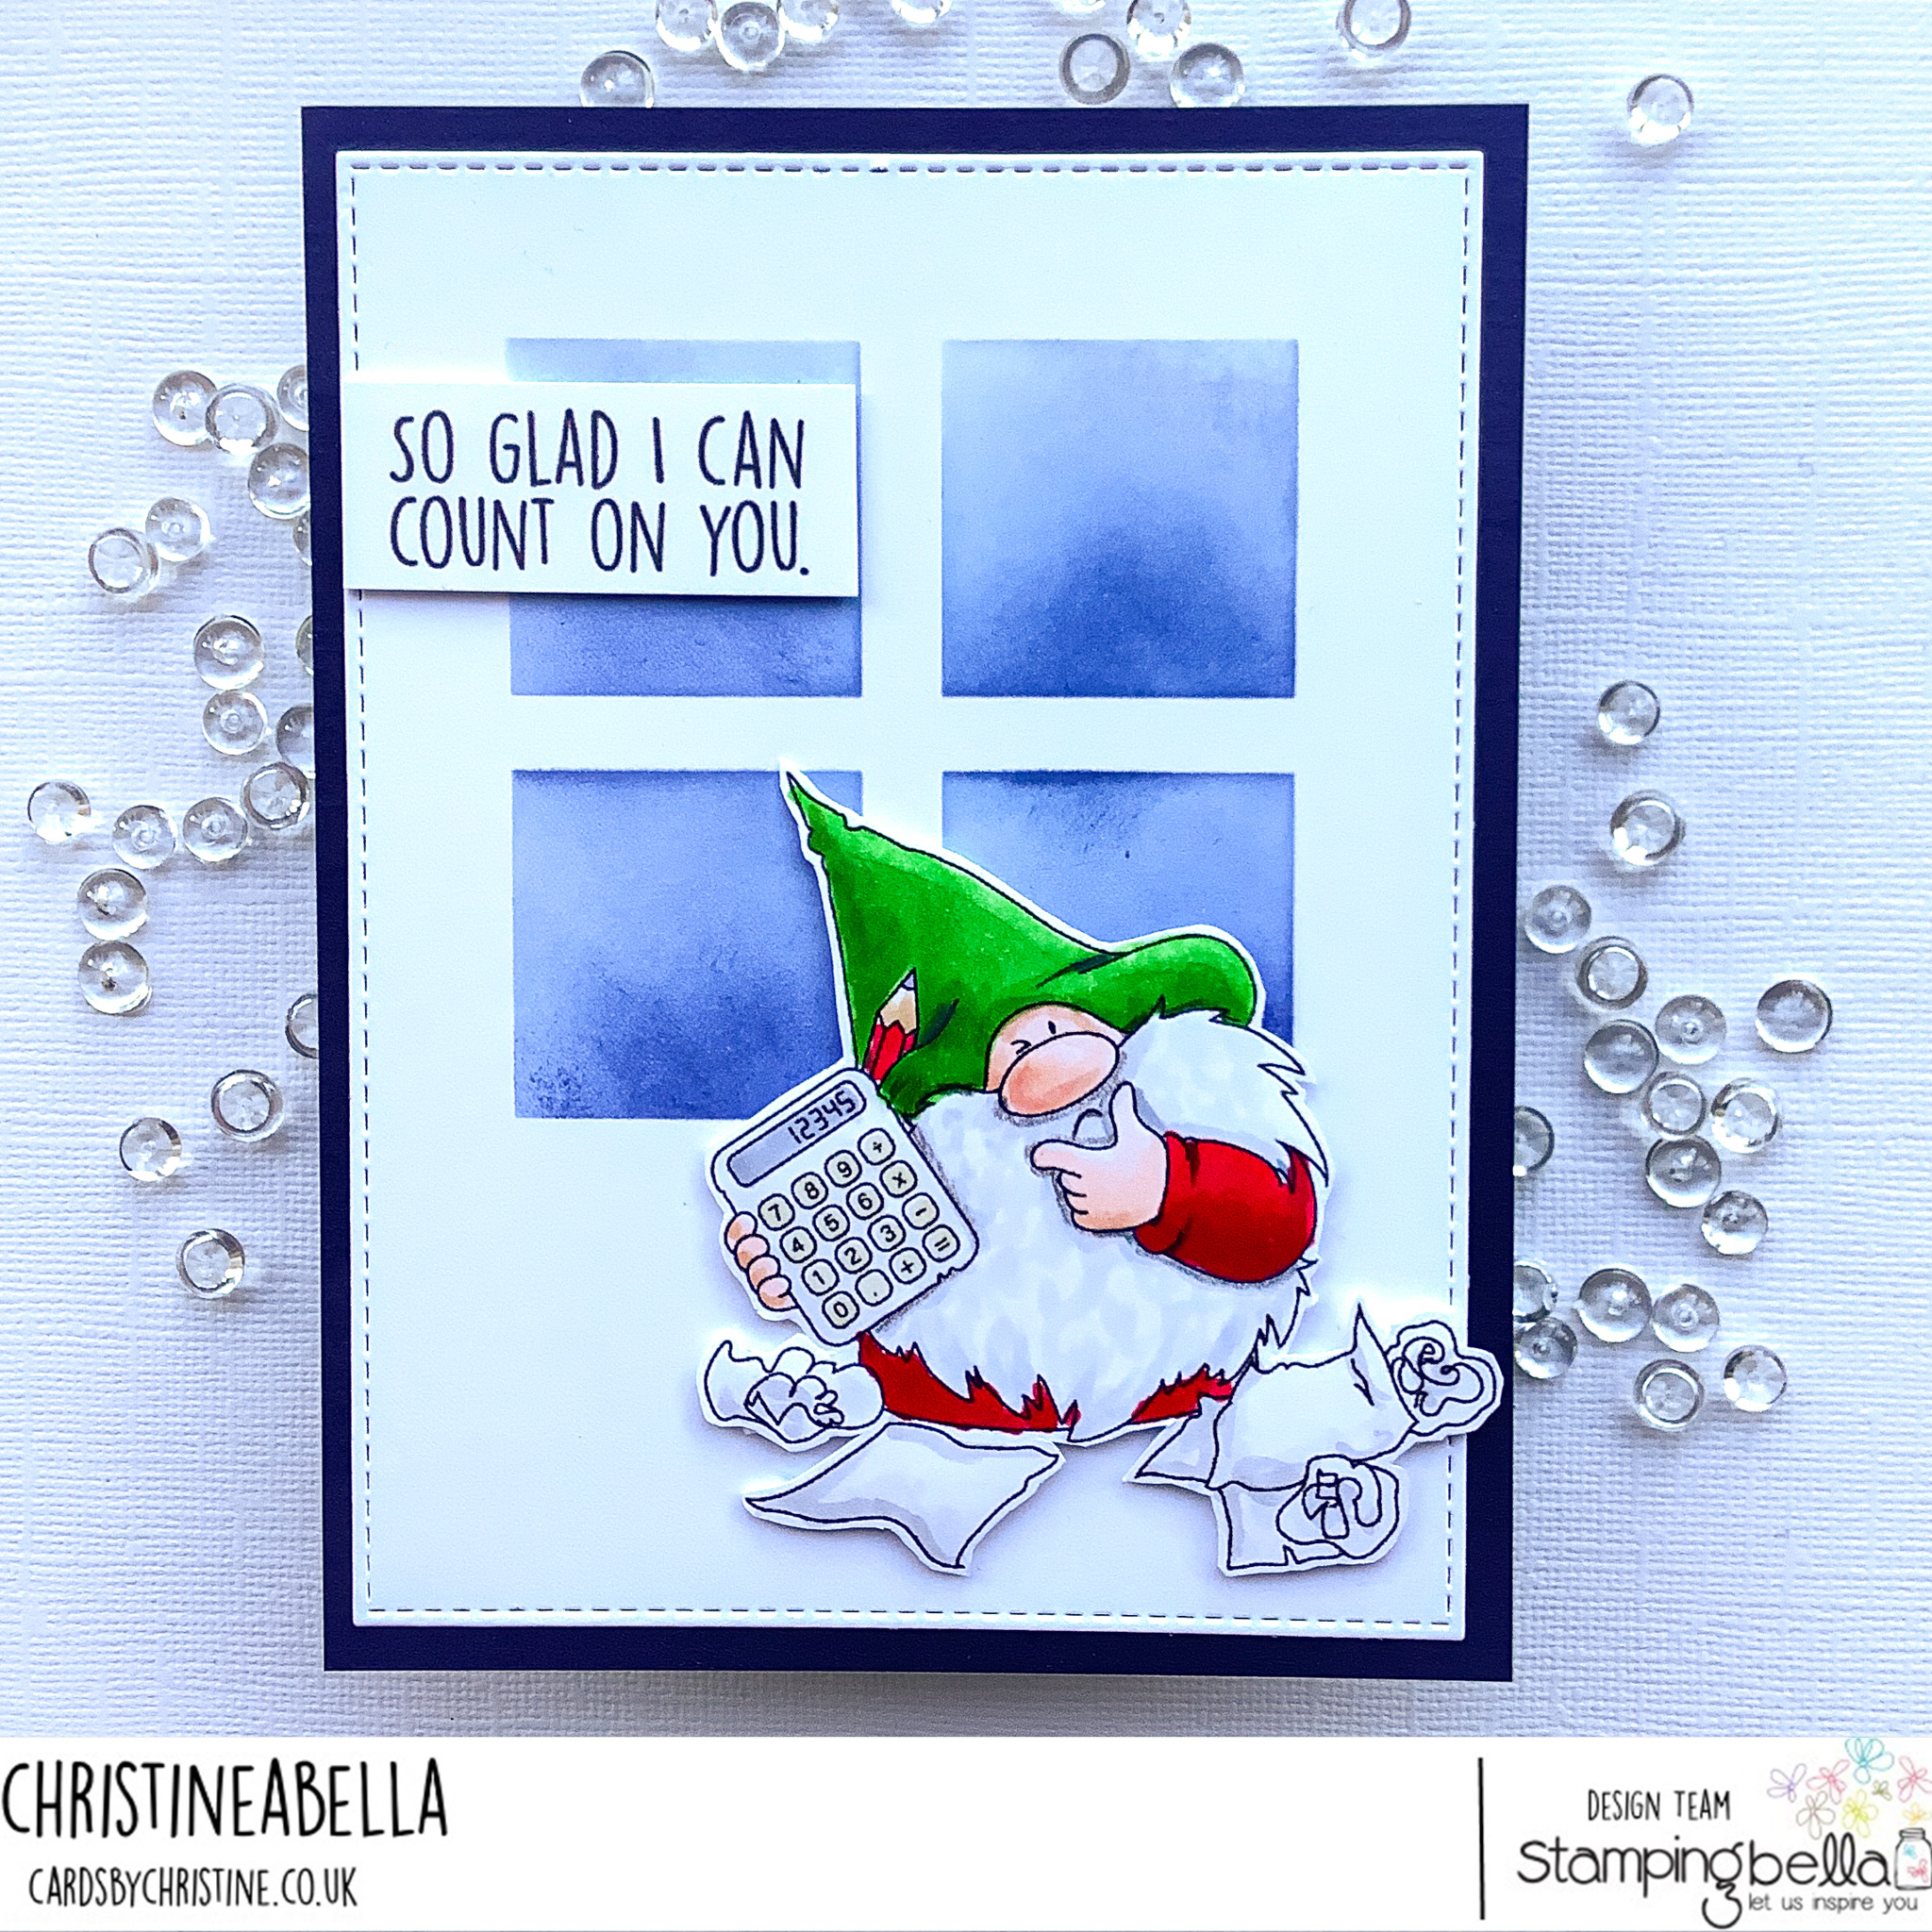
Now we have a very clever chap... it's the Gnome Accountant..   he's adding up how much is being spent on goodies in our craft room!  He looks happy enough - despite all the trash paper surrounding him!


Card Info:
Stencil - Clearly Besotted
Colouring - Copics
Skin - As Above
Hat - G14 YG17
Beard and Paper - C0/1
Outfit - R24/27/46 E57


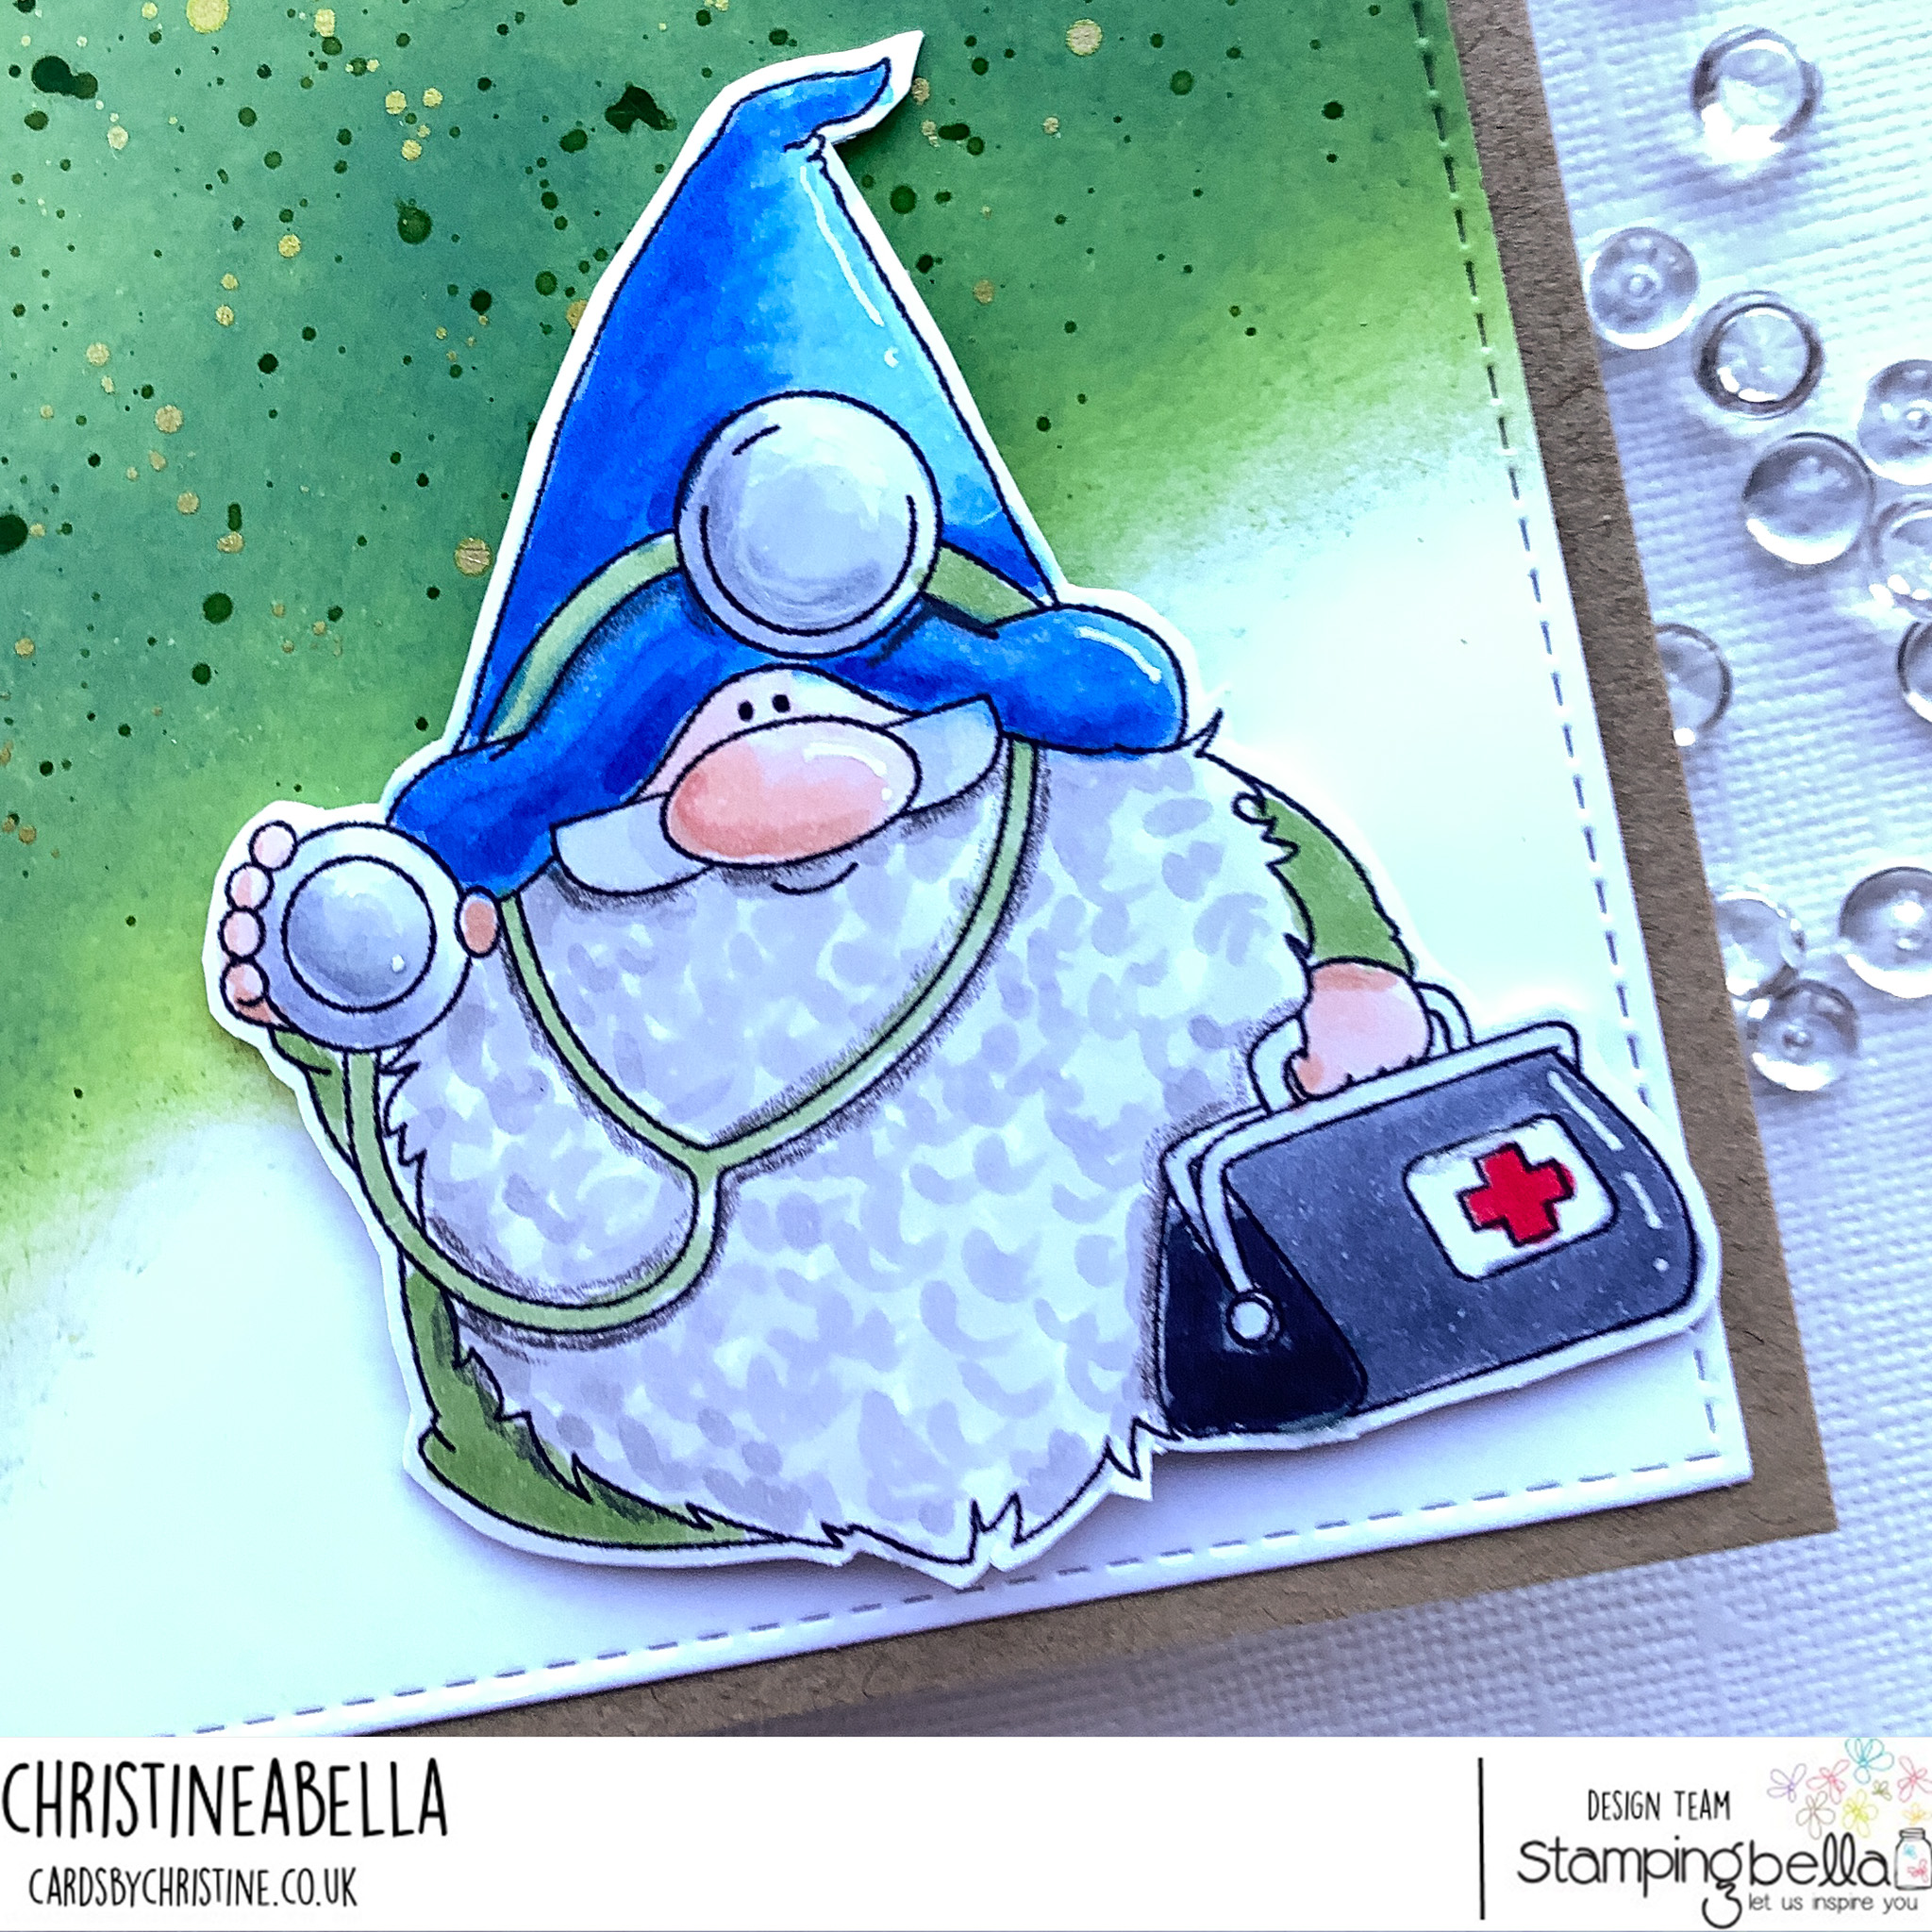
Next we have the Gnome Doctor...  he's been on his hospital rounds and is looking for his next patient!  We've all had plenty to be thankful for the staff in hospitals over the last few years - so I loved the sentiment on this.


Card Info:
Distress Oxides - Mowed Lawn, Rustic Wilderness
Splatters - Gold and Blue Watercolours
Colouring - Copics
Skin - As Above
Hat - B24/26
Beard - N0/1/2
Stethoscope - G14 N0/1/2/3
Bag - C1/7/9 R46


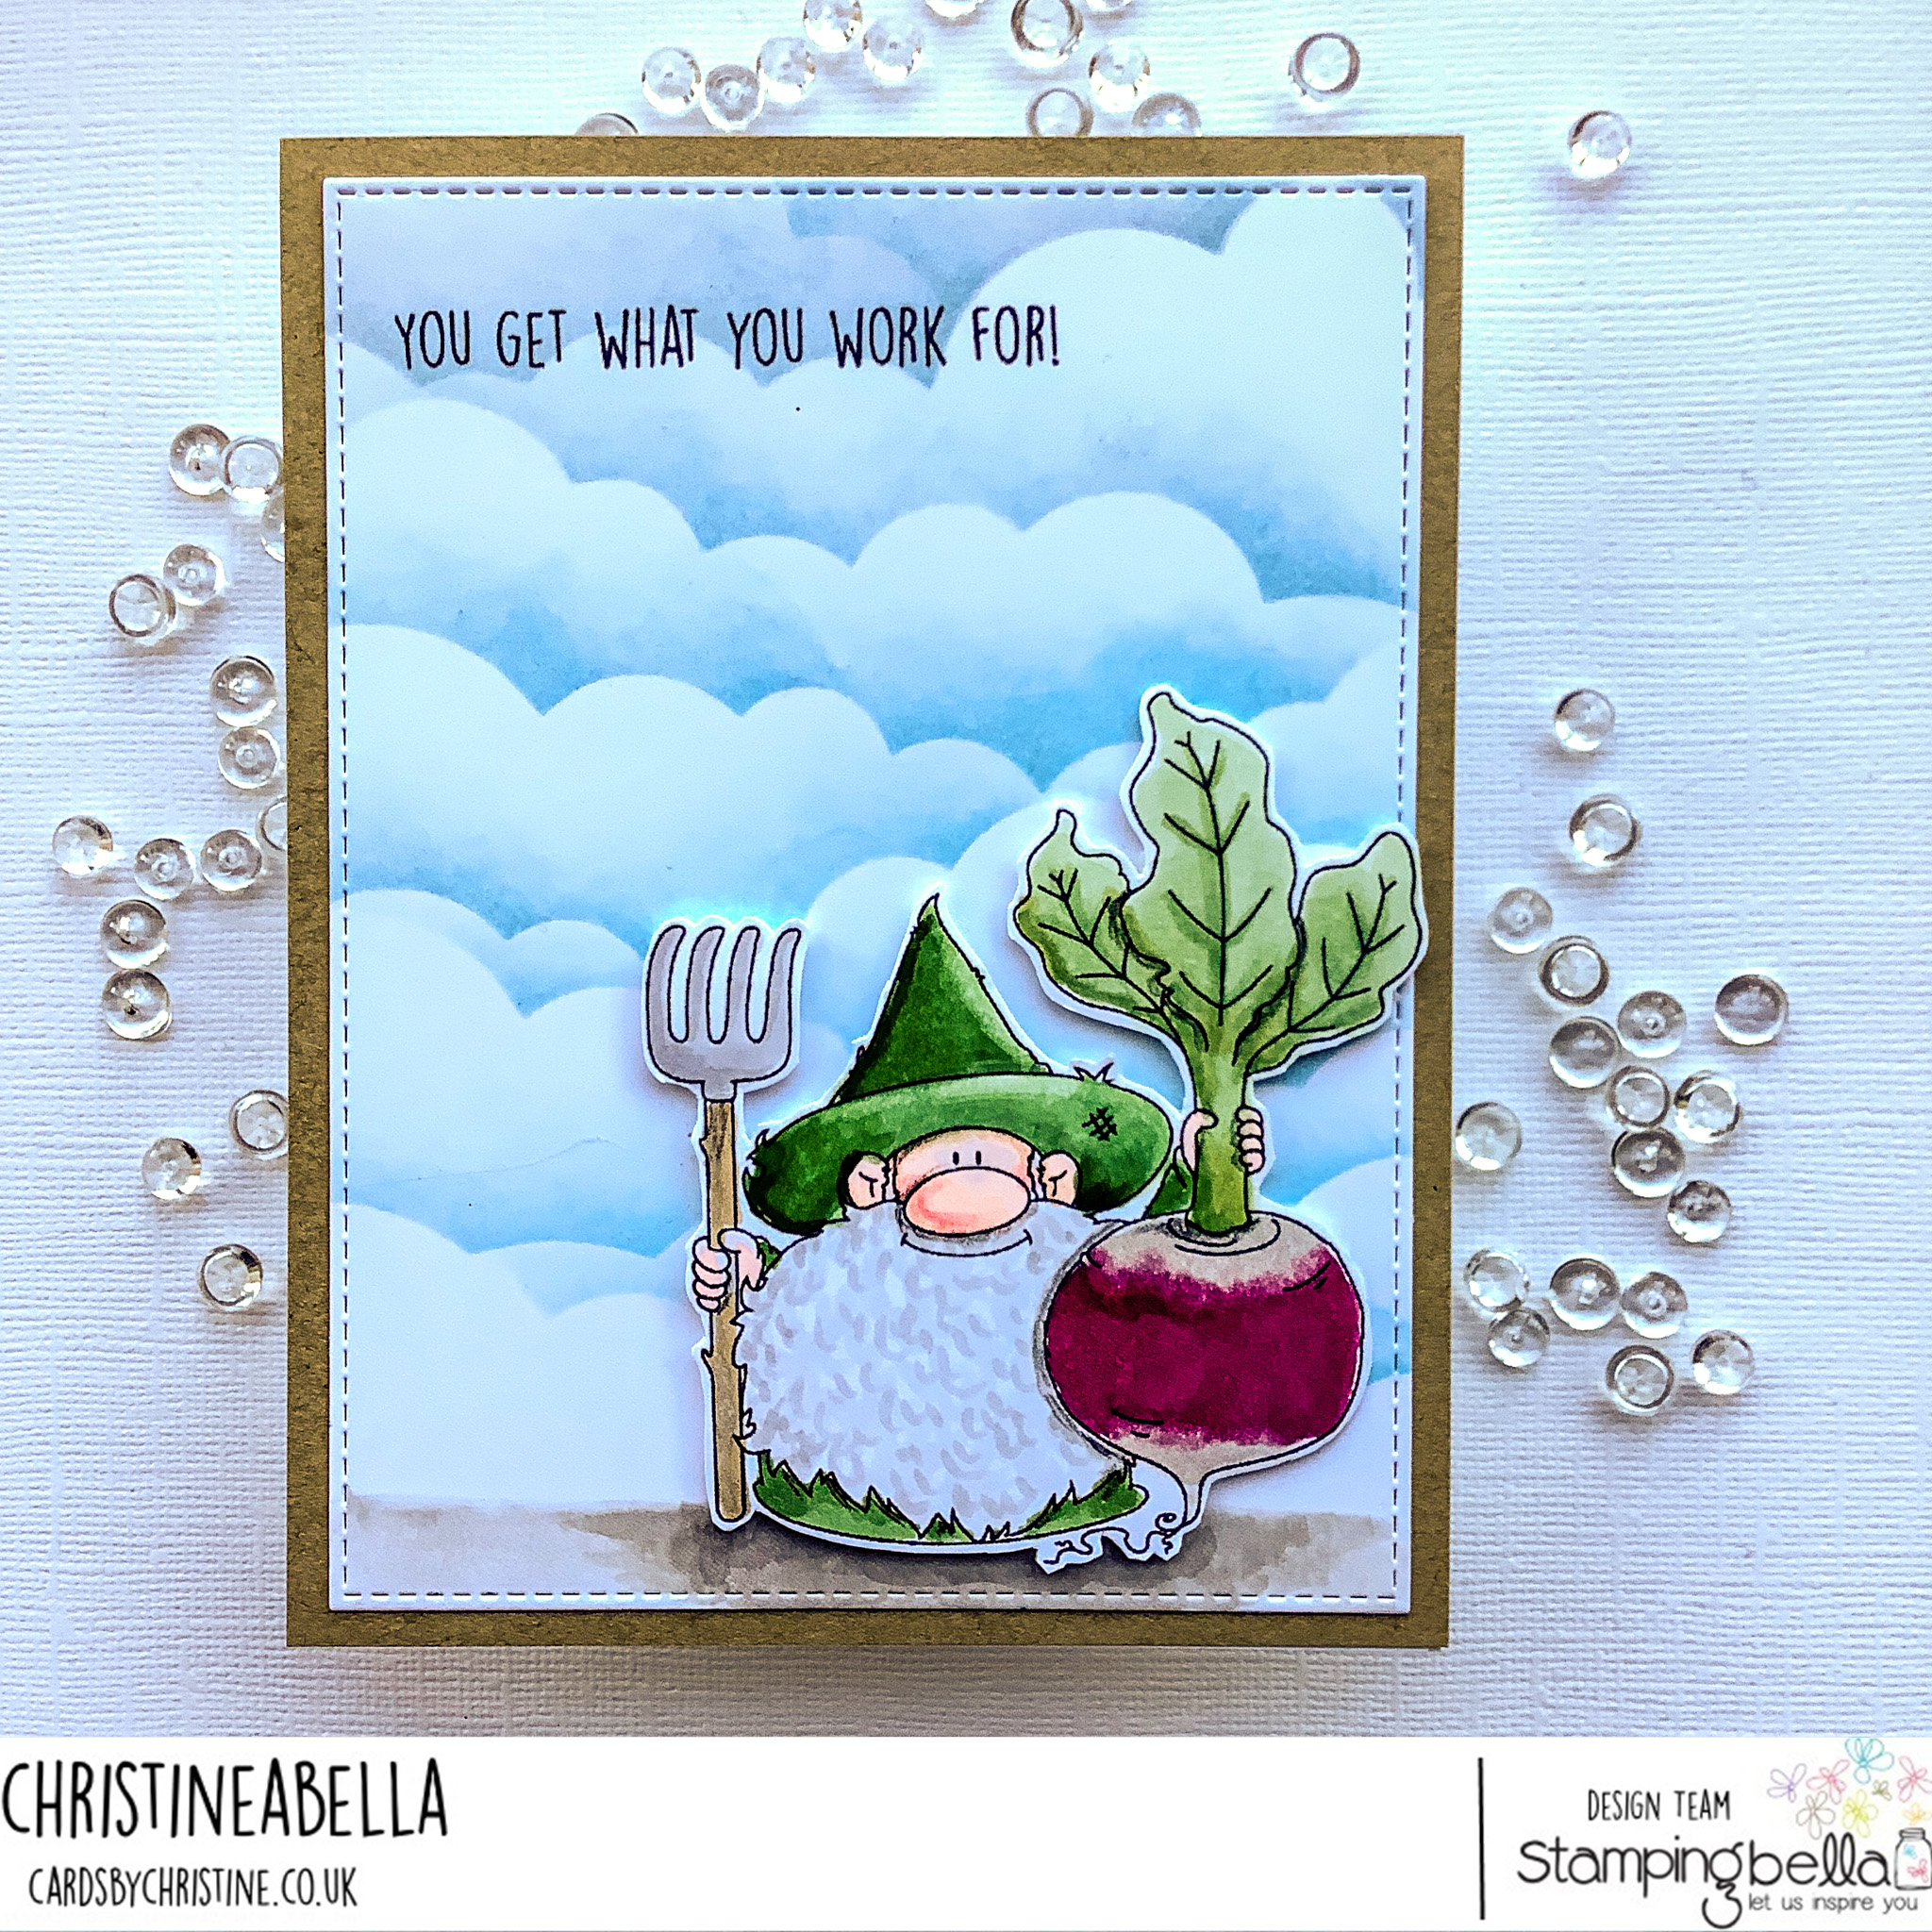
And lastly.... we have this Gnome Farmer - who's been working hard growing this prize turnip - it's huge!


Card Info:
Stencil - MFT Clouds
Distress Oxide - Tumbled Glass
Colouring - Copics
Hat and Coat - YG61/63 G04
Turnip Leaf - G24 YG93
Beard - T0/1
Take - E43 T1
Turnip - E43 R59/89

I hope my cards have inspired you to check out the new release on Tuesday - I'm sure you won't be sorry - these gnomes are a sure way to brighten up your days!

Don't forget to check out the Stamping Bella Blog where you'll find so much more inspiration from my fellow Babes..  and also the Sistahood Facebook Page - there'll be lots shared there too.

I'll be back tomorrow with another sneak peek!

Happy Crafting!

Friday 27 January 2023

Stamping Bella Curvy Girl Angel


Hi Lovelies...

Time for another Bellarific Friday card at Stamping Bella - and as it's the last one of the month, we're using images from the latest release.  I chose to use the Curvy Girl Angel for mine, with a sentiment from the Angels and Devils Sentiment Set.

I coloured and fussycut the image... using a white gel pen to do lots of dots on the boots and gloves... to try to give the sparkle effect.  Not easy to see on the photos I'm afraid!  Also not easy to see, is the glitter on her wings, and the glittery background that I blended with Distress Oxides, then stamped with Versamark and used sparkly embossing powder. I've taken a couple more photos to try to show the effect which, in real life, is fabulous.


I adhered the image with 3D foam pads to give depth..  then added the sentiment in the corner.


Card Info:
Taylored Expressions Twinkle Twinkle Background Stamp
Distress Oxides Spun Sugar and Cracked Pistachio
Die - MFT Stitched Rectangle
Colouring - Copics
Skin - E000/00/11 R20
Hair - E41/42/43
Bodice - BG32/34/72
Gloves and Boots - RV91/93
Wings - BV31/R00
White Gel Pen and Glitter

Hope you like my sparkly make today.  Don't forget, you can pop over to the Stamping Bella Blog for more inspiration from my fellow Babes...  or you can check out the Sistahood Facebook Page to chat and share all things Bella related.

Now.... as you've probably spotted...  it's an exciting weekend at Stamping Bella.... there's a fabulous new release to be available on 31 January... with sneak peeks over the weekend!  Watch this space..

Big hugs

Wednesday 25 January 2023

Rachelle Anne Miller Love Birds


Hi There...

As it's getting close to Valentine's Day and love is in the air... I decided to colour these Love Birds from Rachelle - they're flying among the flowers declaring their love for one another!

I coloured with Copics - then die cut the image with a scalloped square die - which I extended to fit the image.  That's easy to do - just die cut half way to start with, then take out of the machine, place the other end where you'd like it, and pop it back in your die-cutting machine - again only going half way.

I added a little sentiment from MFT and embossed in gold, though that's not see-able on the photos!


Card Info:
Die - MFT Stitched Scalloped Square
Sentiment - MFT Itty Bitty Love Sentiments
Paper - Anna Marie Designs Dotty Blue
Colouring - Copics
Birds - Y15/17/19
Flowers - R81/83/84, RV52/63/55, YR12/61/65, E33
Greens - YG61/63/17
Hearts - R43

Hope you like my make today and that you'll pop over to the Rachelle Anne Miller Blog or the Facebook page for more inspiration.

Happy Crafting Everyone...

Sunday 22 January 2023

MFT Stitched Garden


Hi Lovelies...

Today I've played with the fabulous Stitched Garden Die Set from MFT.. and loved how it turned out.  

Firstly, I created a Distress Oxide blended background - splattered with gold in the central square.  Then I diecut a white square frame for the flowers to sit in.  I used glitter card for the centres of the flowers... and then also for the diecut sentiment I added.


Card Info:
Dies - MFT Stitched Garden, MFT Stitched Scalloped Square
Spellbinders Yana Smakula's Scripty Sentiments
Distress Oxides - Spun Sugar, Worn Lipstick, Dried Marigold
Gold Watercolour Paint

Hope you like my make today..

Happy Crafting

Friday 20 January 2023

Stamping Bella Mouse Bouquet


Hi Lovelies...

It's Bellarific Friday at Stamping Bella!  Today we're using stamps from the Animal Friends collection... so I chose to use this gorgeous little Mouse Bouquet.

I coloured the image, then diecut a square panel around him.  I matted some pink card, then created a card by folding back the front - so I was able to put the beautiful sentiment inside.  Not easy to explain, and I'm sure there's a proper term for the type of card.. but I can't figure it - so there's photos to show!  


I embossed the front with a hearts embossing folder - hope you can see it.


Card Info:
Image and Sentiment - Stamping Bella Mouse Bouquet


Hope you like my card today and that you'll pop on over to the Stamping Bella Blog - and also don't forget you can chat and share all things Bella related over on our Sistahood Facebook page.

Happy Crafting...

Thursday 19 January 2023

Paper Rose Studios Heart Confetti Circle


Hi Lovelies

Today I've used a lovely die that a good friend sent to me recently..  I was thrilled to bits to receive it!  It's from Paper Rose Studios in Australia and is called Heart Confetti Circle - it's perfect for any type of card where you're sending a little love.

I diecut it from a white square card panel which I'd previously diecut with Li'l Inkers Stitched Square.  Then I used 3D foam tape to lift it off the background panel - which I'd created with an LOTV digital paper.

I diecut the word Birthday (from Honey Bee Stamps) and cut the word shadow from the same digi paper.  Simples!

Hope you like...

Happy Crafting

Tuesday 17 January 2023

Pretty Pink Posh Potted Roses


Hi Lovelies..

A very simple card from me today using this gorgeous little Potted Roses stamp set from Pretty Pink Posh.  Of course, as we're coming up to Valentines Day, I decided the roses should be red!  I coloured the image, then fussy cut before making my card panel.

I used masking tape to allow me to use Distress Oxides on the top - blending colours.  Then I did a bit of a Bokeh effect with my Picket Fence Distress Ink through a circle stencil.  Lastly, and while the mask was still in place, I splattered with gold watercolour paint.  Difficult to pick up on photographs, but it's there.

I just popped the sentiment on, then added the roses with 3D foam pads to give depth.


Card Info:
Image - Pretty Pink Posh Potted Roses
Distress Oxides - Tumbled Glass and Peacock Feathers
Distress Ink - Picket Fence
Gold Watercolour Paint
Gems


I've tried to capture the gold on this last photo.  Hope you like!

Big hugs and Happy Crafting...

Friday 13 January 2023

Stamping Bella Bundle Girl with a Snowdrop


Hi Lovelies...

For today's Bellarific Friday card at Stamping Bella, I chose to use this little Bundle Girl with her snowdrop - as the snowdrops have appeared in our garden...  they're in bud, just about to flower.  When I see them I know Spring is around the corner - so definitely there's hope for better weather and lots of other flowers.

I created a background by using Distress Oxides stencilled through a rectangle..  then I coloured the image, fussy cutting her and adhering with foam pads.  Lastly, I added the sentiment.  I matted the panel onto some matching pink card stock.


Card Info:
Stencil - Taylored Expressions Rectangle
Die - MFT Stitched Rectangle
Colouring - Copics
Hat - V25/20/17
Skin - E00/11 R20
Coat and Boots - G12/20
Snowdrops - BV31 G40
White Gel Pen

Hope you like my make today - and I hope that the snowdrops are appearing in your garden too!

Happy Crafting...

Tuesday 10 January 2023

Whimsy Happy Word Die


Hi Lovelies...

Today my card is very CAS and designed for my son-in-law whose birthday it is this week.  I created a background with Cosmic Shimmer Pixie powders sprayed with water - there is a lovely frosty sheen in real life, hard to see on here.  Then I just added a simple 'Happy' word die from Whimsy, diecut three times to add height - with a tiny 'birthday' word embossed in white on black card and added with a foam pad.


Hope you like my CAS make!

Happy Crafting

Sunday 8 January 2023

Spellbinders Flower Frenzy


Hi Lovelies..

I created this card today using the Spellbinders Flower Frenzy embossing folder...  I diecut a circle from a square panel, then embossed it - adhering the panel to some gorgeous rose gold glitter card with foam tape.  

For the sentiment, I used one from the lovely Avery Elle Everyday Circle Sentiments, stamping with Versamark and embossing with rose gold (unfortunately, the gold doesn't show up on my photo!)  I then diecut the sentiment using one of the MFT Pierced Circle Dies adding it with foam tape, so that the glitter card cut be seen.  Finally, I added a tiny heart cut from the glitter card to the sentiment circle.  

Simple... but elegant... yes???

Happy Crafting

Friday 6 January 2023

Stamping Bella Snuggle Owlies


Hi Lovelies...

Yayyy... it's the first Bellarific Friday of 2023 - and it's also Stamp of the Month time!  You can get these gorgeous Snuggle Owlies for half price throughout January.. they're so darn cute having a cuddle on their branch.

I coloured and fussy cut the image - then diecut a panel to adhere them to.  I added the sentiment, then added a kraft card panel behind - which shows through the tiny holes.


Card Info:
Dies - MFT Stitched Rectangles, Spellbinders Venise Lace Rectangles
Colouring - Copics
Owls - E70/71 W0/1/3 T0/1
Hat and Scarf - RV91/93/95
Branch - E43/74
Leaves - YG11/61 G24

Hope you like my card today... and that you're enjoying the start of 2023... hope it's a good year for you.

Happy Crafting...

Wednesday 4 January 2023

RAM Valentines Bear


Hi Lovelies...

Firstly... Happy New Year!  Let's hope for a wonderfully crafty year to come!

I'm sharing a card I made with the new release from Rachelle at RAM Designs... it's one of four that will be available from tomorrow.  

I coloured and fussy cut the bear - then I created a cloudy background by using Distress Oxides over a cloud stencil..  cutting a circle from it.  I adhered the circle to my card panel with 3D foam pads, then added the bear and balloon.  I finished with the sentiment.


Card Info:
Stencil - MFT Clouds
Dies - MFT Stitched Rectangles, Circles
Colouring - Copics
Balloon - R24/27/46 E57
Bear - E30/31/33/41

Hope you like my first card of 2023!

Happy Crafting...