Friday, 31 March 2023

Stamping Bella Gnome Accountant


Hi Peeps...

Today I'm back with a card using one of the images from the latest release for my Bellarific Friday make..  I chose to use this cute Gnome Accountant.

I coloured the image, then diecut it with this Notebook Edge border which I've had for years - I like the effect.


Card Info:
Die - MFT Notebook Edge
Paper - MFT Gingham
Colouring - Copics
Hat - YG23/17
Skin - E000/00 R20
Coat - B21/23/24/26
Beard - N0/1/2/3
Paper and Grounding- W0/1
Calculator - W1 R08

Hope you like my make and that you'll pop on over to the Stamping Bella Blog for more inspiration from the Bella Babes!

Have a great weekend...

Friday, 24 March 2023

Stamping Bella Tiny Townie Garden Girl Daffodil


Hey Peeps..

I've been a little quiet this week on here - I've had a busy week otherwise which I've loved, but not been able to get into my craft room as much as I normally do!

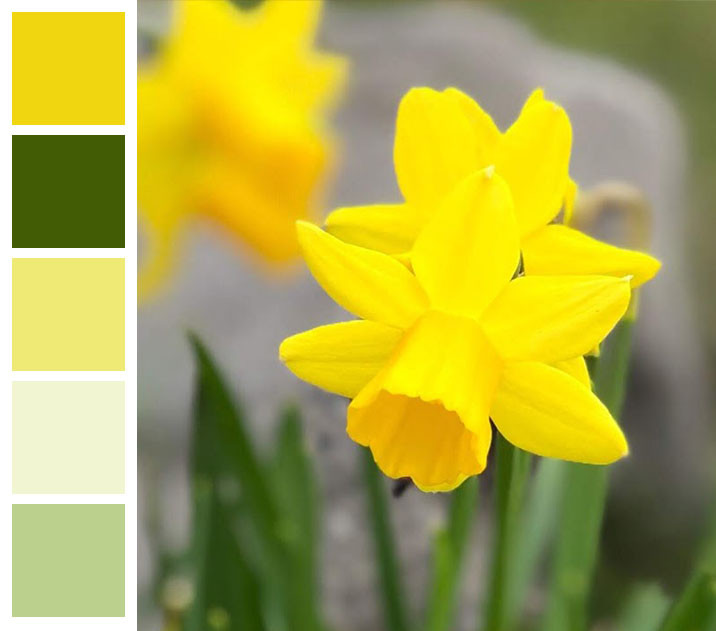
But I'm back today with my Bellarific Friday card - this time we had a photo colour inspiration to follow..  and I felt it was perfect for a Springtime card.


One of my favourite of the Garden Girls is the Daffodil - so that stamp was perfect for my card this time.  I coloured and fussy cut her - then played with some magical powders from Lindy's Stamp Gang in a couple of shades of green.  I diecut the panel I created with circle dies, then adhered them to a 3D embossed leafy background - and finally adhered the Daffodil Girl with 3D foam pads.


Card Info:
Leafy 3D Embossing Folder from Spellbinders
Lindy's Stamp Gang Magical Powders
MFT Circle Die
Colouring - Copics
Hair - E21/23
Skin - E000/00/11 R20
Flower - Y06/15/17/18 YG23/17

I think I managed to use all the colours required in the photograph thanks to those powders...  I do love playing with them but you should see my hands afterwards!  Ah well... such is art!

Happy Crafting .....

Friday, 17 March 2023

Stamping Bella Bundle Girl and the Beehive


Hi Peeps..

It's time for another Bellarific Friday at Stamping Bella, and this week we're using stamps from the Bundle Girls collection - so I chose to use this gorgeous Bundle Girl and the Beehive.

I coloured and fussy cut the image, then created a background by Distress Oxide blending through a hexagon shaped stencil.. splattering the colour with water and gold watercolour paint while the stencil was still in place.  Then I adhered the image with 3D foam pads, adding one of the two sentiments included in the set.


Card Info:
Die - MFT Stitched Rectangles
Stencil - Taylored Expressions Hexagon
Distress Oxides - Scattered Straw, Mustard Seed, Fossilized Amber, Wild Honey
Colouring - Copics
Girl - BG32/34/45/49 RV52/63/55
Bees and Beehive - Y15/16/38 YR23/24/27 BV31 E57/29
Leaves and Grass - YG23/17
Gold Watercolour Paint
White Gel Pen

Hope you like my make today.  Don't forget to check out the Stamping Bella Blog where you can find more inspiration from the lovely Babes... and also the Sistahood Facebook Page to chat and share all things Bella related.

Have a lovely weekend... hope you get some crafting time in!

Wednesday, 15 March 2023

LTTS Mouse Love


Hi Lovelies...

Today I'm sharing a card that I made a couple of weeks ago..  around Valentine's Day I think - but somehow I didn't get around to blogging it - I don't know why!  Anyways...  as this gorgeous little mouse was feeling a little neglected sitting in the corner of my desk - I felt like it was her turn to shine!

I coloured and fussy cut the image - then created a background by Distress Oxide Blending through a rectangle stencil first, then overlaying with hearts.  I added a tiny sentiment at the top, then adhered the mouse with 3D foam pads.


Card Info:
Image - LTTS Mouse Love Digital Stamps
Sentiment - Clearly Besotted Fancy That
Die - MFT Stitched Rectangles
Distress Oxides - Peacock Feathers, Broken China, Cracked Pistachio
Colouring - Copics
Mouse - N0/1 R000, BG10/11/13
Balloons - R24/27/46 E57
White Gel Pen

Hope you like my little mouse friend as much as I enjoyed making the card.

Happy Crafting...

Saturday, 11 March 2023

Sweet November Imogen


Hi Peeps...

I have another Sweet November card to share with you today as part of my Guest Design spot...  this is Imogen from the March of the Fairies release.... she's beautiful and I thought, perfect for pink!

I coloured and fussy cut the image, then created a background by blending Distress Oxides onto one corner of the die cut square... before splattering with gold and deeper pink watercolours.  I added a sentiment which I heat embossed with gold, then adhered the fairy with 3D foam pads... adding a few gems for good measure!


Card Info:
Sentiment - Hello Bluebird Sparkles Script
Die - Lil' Inkers Stitched Square
Distress Oxides - Spun Sugar, Kitsch Flamingo, Worn Lipstick
Colouring - Copics
Dress - R81/83/85
Wings - R000/V000
Cymbols - C0/1
Skin - E0000/000/11 R01/20
Hair - E40/42
Gold and Pink Watercolours
Gems

I was firmly back in my pink zone for this card - and in my favourite shades of pink too.  Hope you like it!

Happy Crafting...

Friday, 10 March 2023

Stamping Bella Curvy Girl Strutting


Hi Peeps...

Another Bellarific Friday has come around... gosh, don't the weeks go by quickly! 

This time, we're using images that aren't from the current release..  so I chose to use this gorgeous Curvy Girl Strutting - she and her little girl are listening to music and dancing around the room!

I coloured and fussy cut the image and sentiment - then a created a background using some designer paper.  I adhered both the image and sentiment with 3D foam pads for depth. 


Card Info:
Paper - MFT Sweet Celebration
Die - MFT Stitched Rectangles
Colouring - Copics
Mum - Hair E21/23, Skin E000/11 R01/20, Top B21/23, Pants and Flowers RV52/63/55
Girl - Hair E40/43/43, Skin E000/11 R01/20,Top G20, Pants BV31

Hope you like my make today - and I hope YOU dance when you hear music!

Don't forget you can find more inspiration over on the Stamping Bella Blog - and you can chat and share all things Bella related on the Sistahood Facebook Page.

Have a good weekend..

Wednesday, 8 March 2023

Paper Smooches


Hi Lovelies...

I've been playing again... this time with this gorgeous old Paper Smooches stamp set... which includes the flower and the bee.  

I coloured and die cut both of the images, then did a little Distress Ink shading for the flower to be adhered to.  I used 3D foam pads for both images, then added a sentiment from their Sentiment Sampler set..  and a few sequins to finish a very CAS card.


Card Info:
Images - Paper Smooches Well Wishes Stamp Set
Sentiment - Paper Smooches Sentiment Sampler
Distress Ink - Tumbled Glass
Colouring - Copics
Flower - RV52/63/55
Leaves - YG21/23/17
Bee - Y15/18/38

Hope you like my CAS make today!

Happy Crafting...

Saturday, 4 March 2023

Sweet November Stamps Titania


Hi Lovelies...

I'm very excited today as this month, I'm a Guest Design Team member for Sweet November Stamps - and there is a brand new release.. and even better... they are fairies!  What could be more up my street?? 

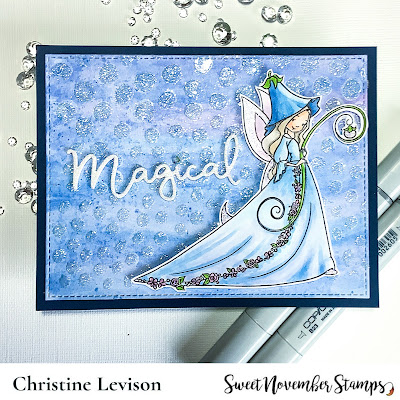
I've used the gorgeous Titania for my card - colouring and fussy cutting her, before creating a background for her.  For that, I used watercolours to paint a die cut panel with blues and pinks, then after it had dried, I added translucent texture paste through a dotty stencil - sprinkling on fairy dust before it had dried.

Then I used 3D foam pads to adhere the fairy, and added a diecut sentiment cut from glitter card - well, a fairy can't have too much sparkle, can she???


Card Info:
Sentiment - Hello Bluebird Magical Sparkle Word Die
Die - MFT Stitched Rectangle
Colouring - Copics
Skin - E000/01 R20
Hair - E40/41
Dress and Hat - B21/23/01/60
Wings - V0000/000/20
Flowers and Leaves - R83 YG23

Hope you like my card today... I'll be back in a few days with another fabulous fairy... watch this space!

Happy Crafting... 

Friday, 3 March 2023

Stamping Bella Bundle Girl on a Plane


Hi Lovelies...

This time, for our Stamp of the Month at Stamping Bella, we're highlighting this gorgeous Bundle Girl on a Plane which you can get with 50% discount throughout March!

I coloured and fussy cut the image, then created a background - after being inspired by the lovely Rachel at @theunpamperedstamper, who had used these colours in her sky.   I used Distress Oxides, blending them together, then splattered with water, then white paint.

Then I used a cloud border die on white card, to show the clouds she's flying above when I adhered her with 3d foam tape.  I stamped the sentiment which is included in the set on the corner of one of the cloud panels, then finished by adding a couple of small clouds in the sky.


Card Info:
Dies - MFT Stitched Rectangles, Lawn Fawn Puffy Cloud Border, Paper Smooches Small Clouds
Distress Oxides - Peacock Feathers, Wilted Violet, Salvaged Patina
Colouring - Copics
Plane - B60/63
Girl - E000/00 R20, BG11/45/49, V10/20/15/17
White Paint and Gel Pen

This is another card I especially enjoyed making - I think I'm getting more and more into the purple and aqua colours.... but pink will always be my favourite!

Don't forget to pop over to the Stamping Bella Blog for more inspiration from the Babes, and also to the Sistahood Facebook Page to chat and share all things Bella related.

Happy Crafting...

Thursday, 2 March 2023

Lawn Fawn Secret Garden Window


Hi Lovelies...

Today, I've used the gorgeous new Secret Garden Window die set from Lawn Fawn for my card..  I really loved making it and how my card turned out!

The first die cuts the window, and the second cuts a smaller window with the foliage and flowers around it... which are easy to colour.  I coloured a little fairy to flutter in the flowers too.  Then I created a Distress Oxide blended and splattered  background to adhere the window to with 3D foam pads.  I added a tiny sentiment embossed with silver to the front and it was done.


Card Info:
Die - Lawn Fawn Secret Garden Window
Die - MFT Stitched Rectangles
Image - Lawn Fawn Fairy Friends
Sentiment - Pretty Pink Posh Simple Sentiments
Distress Oxides - Spun Sugar, Wilted Violet, Shabby Shutters
Colouring - Copics 
Fairy - E000/R01 R20, C3/5/7, R81/83/85, B60/V000/V01
Frame - YG21/23/17/61 G14
Flowers - V20/15, R81/83, Y15/17

Hope you love it as much as I did making it!

Happy Crafting...