Monday, 25 September 2023

Distress Ink Blending


Hi There...

Last week I spotted a gorgeous card by the lovely Barbara at @btarayao, and it inspired me to get out my stronger colours of Distress Inks and get blending!  

Firstly I blended the four colours on a sheet of Bristol Smooth, the blending didn't look that even, but then I splattered with water, then white and gold watercolours which make all the difference.  I stamped with a deeper colour using a script background stamp which also gives texture as Barbara had done.

Then I used a rectangle stitched die to cut out the centre, adding a scalloped die to the back of the cut panel.  I used 3D foam tape to adhere the panel back onto the centre.

I used some white card to diecut this gorgeous flower, which is an older Memory Box die that I've had for years, but thought it was right for this card.  I cut it and layered 3 times to give depth.  Lastly..  I cut a little hello word die from gold mirri and adhered it alongside the flower.  I added the whole panel to a white card base and it was done!


Card Info:
Dies - Memory Box Hollyhock Stem, Sunny Studio Fancy Frames Rectangles, 
MFT Stitched Rectangles, Altenew Sweet Sentiments, 
Stamp - MFT Romantic Script
Distress Inks - Carved Pumpkin, Barn Door, Festive Berries and Picked Raspberry

I really loved how this card turned out - and will no doubt be using this design again with other dies and maybe different colours...  so thank you so much Barbara for the inspiration!

Happy Crafting...
Friday, 22 September 2023

Stamping Bella Bundle Girl at the Pumpkin Patch


Hi Lovelies...

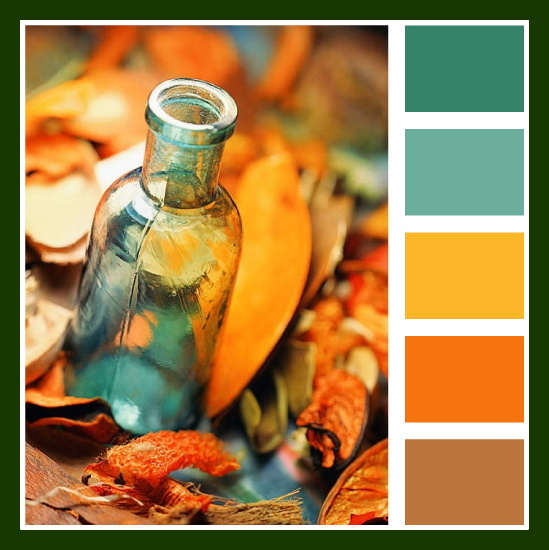
Well, the week's gone around again and here with are back on another Bellarific Friday!  This time, we had a colour inspiration photo to follow..


Good colours for Autumn/Fall cards I thought... so out came my Bundle Girl at the Pumpkin Patch.. hopefully I followed the colours needed.


Card Info:
Die - MFT Stitched Rectangles, Tiny Leaf Die - don't know the name 
Colouring - Copics
White Gel Pen

Don't forget to pop over the the Stamping Bella Blog to see more inspiration from the Babes, and also to the Sistahood Facebook Page to chat and share all things Bella related.

Happy Crafting..

Friday, 15 September 2023

Stamping Bella Mochi Fall Girl


Hi There...

We're using images from the Stamp of the Month collection today at Stamping Bella - so as that's a Mochi Girl, I've used Mochi Fall Girl.  

I'm really into Autumn/Fall colours at the moment so was happy to colour this gorgeous image - but she was a little too tricky to fussy cut afterwards, so I just added a matching panel on the side, with a strip of glittery cardstock.


Card Info:
Deep Orange Cardstock
Colouring - Copics
Face - E000/00/11 R20 E04
Hair - E21/23/25/27
Scarf - YR23/24/27
Coat - YG91/93/95 G99
Mug - R08/24
Leaves - YR14/18/23/24/27 E09 YG23/25

I think she looks as warm as toast, no matter what the weather, in that huge scarf and coat! And then with her mug of what I think is hot chocolate, she'll stay warm!

Hope you'll join us on the Stamping Bella Sistahood Facebook Page where you can share and chat all things Bella related!

Happy Crafting...

Thursday, 14 September 2023

Gina K Designs Spectacular Sunflowers


Hi Lovelies...

I fell in love with these Spectacular Sunflower Stencils from Gina K Designs when I saw Jennifer McGuire use them in a video tutorial.  Well - it took a while for me to get hold of them here in the UK, but I did eventually, so to start with I thought I'd use the four-in-one method that Jennifer used.  Yayyyy it worked!  Thank you Jennifer!

It starts by cutting a piece of white cardstock 8.5 x 11 inches, then cutting that into four panels that are 4.25 x 5.5.  Then the magic!  The four panels are then taped together (on the back) which removable tape to form the original.  Then, the stencil is used in the centre, in effect putting a quarter of the flower on all four cards in the corner.  Now, turn all four cards so there's a blank part in the centre - and use the stencil once again.  Turn it another twice - ending up with parts of flowers in all four corners - you can use the same or different colours as I have done.  If you'd like to see the video, check out Jennifer McGuire's YouTube channel - it's so easy to follow.

 Now I also did some splattering with purple and gold watercolour paint, before stamping a Scripty Sentiment from Mama Elephant in the centre of all four cards.


Card Info:
Gina K Designs Spectacular Sunflower Stencils
Simon Says Stamp Pawsitively Saturating Ink - Lilac and Carnation
Distress Inks Mustard Seed, Dried Marigold and Brushed Corduroy
Mama Elephant Scripty Birthday Sentiments
White and Purple Watercolours

I placed the coloured panels onto bright pink cardstock to give them a frame.

Hope you like!

Friday, 8 September 2023

Stamping Bella Tiny Townie Autumn Loves Autumn


Hi Lovelies...

It's Bellarific Friday time - and it's time to use an image that's not from the current release... so I chose to use one of my favourite of all autumnal images... this is Tiny Townie Autumn Loves Autumn.

I coloured and fussy cut the image, then created a background by blending distress oxides, then splattering with white, deep brown and gold watercolours.  I then used a perfect sentiment from another stamp set in the corner, before adhering the image with foam pads.


Card Info:
Distress Oxides - Carved Pumpkin, Tea Dye, Gathered Twigs, Walnut Stain
Colouring - Copics
Toadstool - R24/27/46 E57 E40/41/42/43
Hair - E21/23
Skin - E000/00/11 R20
Leaves and Top - YR21/23/24/27 E14/18 E09/13/18 E57 
YG93/95 G99
Grounding W0/3

We've had a really sunny week here in the UK - so it's not looking like Autumn at all outside, but I know it's just around the corner, so my card will be ready! Hope you like it, and will join in the fun over at the Sistahood Facebook Page.

Happy Crafting..

Wednesday, 6 September 2023

Gina K Designs Dahlia Cover Plate


Hi Lovelies...

I used the fabulous Dahlia Cover Plate from Gina K Designs for my card today. I diecut it in white twice from white cardstock and adhered it together.  Then I created a Distress Oxide Blended background to go behind the diecut.

Then I cut the flower part again but this time from gold mirri card, so I could use the negative parts to create some flower petals. I inserted them into the flower, adhering with liquid glue.


I've tried to photograph from all angles, so the mirri card shows up..  it's not easy to photograph as often, it just looks black!

Lastly, I added the panel to seem green cardstock, before adhering to the card base.  These aren't colours I use often, but I was happy with how it turned out!


Card Info:
Die - Gina K Designs Dahlia Cover Plate Die
Distress Oxides - Tumbled Glass, Mustard Seed, Spiced Marmalade, Mowed Lawn
Sentiment - MFT Itty Bitty Sentiments
Mirri Card
Enamel Dot for Centre

Hope you like my make today!  It's very warm here in the UK at the moment... but I think I'll be into autumnal cards soon!

Happy Crafting...

Friday, 1 September 2023

Stamping Bella Mochi Girl Bride of Frankenstein


Hi Lovelies...

We have a new Stamp of the Month at Stamping Bella - and this time, it's this FA-BOO-LOUS Mochi Girl Bride of Frankenstein - so perfect for this time of year!

I coloured the image and fussy cut her, before creating a Distress Oxide Stencilled Square - splattering the shape with lots of white and deep purple watercolours for texture.  Then I adhered the image with 3D foam pads, adding the sentiment panel at the base.  Lastly, I added lots of glitter to her hair - well, a girl's gotta have a sparkle.... right???


Card Info:
Die - MFT Stitched Rectangles
Stencil - Taylored Expressions Squares
Distress Oxides - Villainous Potion, Wilted Violet, Picked Raspberry
Colouring - Copics
Skin - E0000/000/70
Hair - C5/7/9 RV52/63/17
Dress - C5/7 T0/1
Watercolours
Glitter

You can get this fabulous stamp set throughout September for half of it's usual price in the store..  check it out using the link above!

Happy Crafting...

Tuesday, 29 August 2023

MFT Stitched Blooms


Hi Lovelies

Well I've made a big decision in my crafting life - and that is to make sure I use some of my older stamps and dies on a regular basis...  so here's one using a die set from MFT - it's called Stitched Blooms and I do love the flowers it creates!  

I was inspired by a card from Lin at @sending_hugs which I saw some years back - using lots of scraps of tiny print papers - and boy, do I have lots of scraps!  So out they came with my die cutting machine and I got busy!

I just adhered the flowers and leaves as they came to hand - and I then added some enamel dots for the flower centres.


Card Info:
Dies - MFT Stitched Blooms
Paper Strip - MFT Black and White Dots
Sentiment - Mama Elephant Scripty Birthday

Hope you like my bright and cheerful card today!

Happy Crafting...

Tuesday, 15 August 2023

Simon Says Stamp Garden Spires


Hey Peeps..

For today's card, I've used a beautiful embossing folder from Simon Says Stamp - it's called Garden Spires.  I did some ink blending to start with using Distress Inks..  then embossed it, before adding more ink over the flowers using a domed blending foam.  It gives the effect of only colouring the flowers which I thought was an amazing technique.  

I then splattered the panel with gold watercolour paint..  and added a tiny little sentiment panel, before matting and layering with gold mirri card.


Card Info:
Simon Says Stamp Garden Spires Embossing Folder
Distress Inks
Sentiment - Pretty Pink Posh Simple Sentiments

I think this is one of my favourite makes recently - especially in real life!

Happy Crafting...

MFT All the Happy


Hi Lovelies...

Sorry I forgot to add this the other day when I popped it on Instagram - so this is a quickie add!

I used the fabulous MFT All The Happy Die on a coloured panel that I'd blended with Distress inks and printed the 'everything' word on, (created on the PC)!  I then added acetate behind the diecut, before adhering a panel of glitter card, then adhering the panel with foam tape to the card base.  I added some die cut stars from the same glitter card and it was done!


Card Info:
Dies - MFT All the Happy, Sizzix Swirling Stars
Distress Inks
'Everything' word done on PC

Told you it was a quick post - hope you like!

Happy Crafting...

Tuesday, 8 August 2023

Altenew Dainty Flowers


Hi Lovelies...

I'm sharing a few cards I made with another Altenew set - this one is called Dainty Flowers.  I saw a video (I think) by lovely Rachel (The Unpampered Stamper) - and knew I had to have a try with these gorgeous little flowers.

I cut some stitched rectangles, then used some Distress Oxide inks to create a coloured patch for the flower to adhere to. It's quite easy to do this, but (note-to-self), remember to dab onto spare paper after dabbing on the inkpad with my sponge!  If you don't do that, you can get harsh lines or very strong bits of colour! 

OK - sorry, this is picture heavy so I'll let you sit back and enjoy! I used a couple of the stamps, some different colours, then added gems.  The sentiments are included in the stamp set.


Phew!  Hope you liked them..... which was your favourite colour???

Happy Crafting...

Monday, 7 August 2023

Altenew Fragrant Peonies


Hi Lovelies...

Today I'm sharing a card I made with the fabulous Fragrant Peonies Die Set from Altenew.  Peonies have to be one of my favourite flowers.... their blousy flowers are so bright and cheerful - I'm always sad when they droop and disappear so quickly after the time they've spent forming those massive flowers!

I diecut the flowers and leaves, then ink blended them using Altenew Crisp Inkpads.  Then I created a background using Distress Oxides and splattering with gold watercolour paint.  I adhered the flowers and leaves in the corner, adding a little sentiment at the top.  Finally I used 3D foam tape to adhere the card panel to the base.


Card Info:
Altenew Fragrant Peonies Die Set
Altenew Fragant Florals (for the sentiment)
Altenew Crisp Dye Inkpads - Green Fields Set, Sugared Candies Set
Distress Oxides Spun Sugar

Hope you like my card today -  I've got to say it's one of my favourites - I love how it turned out!

Happy Crafting..

Thursday, 3 August 2023

The Stamp Village Happy Birthday


Hi Lovelies..

I'm back with a different type of card today... I bought this stamp set some years back, and recently I've had a bit of a purge on using goodies that have been sitting waiting for their turn in the spotlight!

So... I've used this fabulous Happy Birthday set from The Stamp Village - which was a huge collaboration from lots of the big companies in the crafting industry.  They'd each done an image for the set - so I chose three to use on these cards.

I coloured the image, then cut them into panels..  then I got out a paper pad that had all the colours in I'd used - cutting thin strips then adhering them to a scrap piece of card.  I tidied the edges up and adhered them onto the card panel - then added the coloured image with 3D foam tape.  I did the same for all three cards.


Card Info:
Image and Sentiments - The Stamp Village Happy Birthday Set
Die - MFT Stitched Rectangles
Colouring - Copics
Paper - Sunny Studio Designs Polka Dot Parade


Hope you like my rainbow coloured makes today!  They're much more CAS than my recent makes, with very little colouring!

Happy Crafting..

Tuesday, 1 August 2023

Altenew Zero Waste Flowery Pattern Stencilling


Hey Peeps...

Firstly, Happy August!  I'm 70 this month - so I aim to enjoy myself - whether we have sun or not!

I've been playing with the layering stencils from Altenew's Zero Waste Flower Pattern Set again... this time just stencilling with no stamping.  

I was inspired for the design by a fabulous card that Tina, a lovely crafting friend in Sweden, sent to me.  I didn't have the same dies, and I obviously used different stencils.. but I loved how it turned out.  I finished it off with a gorgeous word die from Spellbinders adhered with foam pads, adding a small 'happy' embossed in white on the pink card that I'd been using.


Card Info:
Stencils - Altenew Zero Waste Flowerly Pattern
Dies - Waffle Flower A2 Lacy Layers
Spellbinders Yana Smakula Scripty Sentiments
Colours - Simon Says Stamp Ink Pads

Hope you like my make today as much as I enjoyed making it.  I'm really enjoying stencilling lately - although I seem to get into an inky mess while playing!  Ah well... such is the price of crafting!

Hugs...