Friday 27 September 2019

Curvy Girl with Bubbly

 
Hi Lovelies..

Today's Bellarific Friday card is using the gorgeous Curvy Girl with Bubbly - I love her so much!!  This time, I went for my pink Copics..  and remember the card I made with lots of stars a couple of weeks back?  The one using the Press n'Seal?  Well, this background is the negative of that Star cover plate...  I matted some silver glitter card behind so it shows through the apertures and hey presto!

I fussy cut the Curvy Girl after colouring her.... ooh and giving her some pink champagne of course!


Card Info:
Die - MFT All The Stars
Distress Oxides
Colouring - Copics
Skin - as per usual
Hair - C5/7/9
Dress - R30/85 RV32/34
Greens - YG17/63 G43
Berries - R27/46
Glass - B60 C1
Champagne and Tag - RV91/93

Hope you like my make.  I do wish I could capture the sparkle that this card has in real life - but I have never managed to capture that on a photograph.  

Don't forget to pop over to the Stamping Bella Blog to see what the lovely Babes have come up with to inspire, and also to the Sistahood Facebook Page to chat and share all things Bella.

Big hugs

Wednesday 25 September 2019

Warm Holiday Hugs


Hi Lovelies..

Today I'm using the fabulous Mama Elephant Fuzzy Friends again - I'm in love with these penguins!  This time, I used the Forest Cover Plate - but just the central part, putting it behind the circle aperture.


Card Info:Image and Sentiment - Mama Elephant Fuzzy Hugs
Dies - Mama Elephant Forest Cover Plate, Lil- Inkers Stitched Circle and Stitched Square
Distress Oxides - Victorian Velvet and Picked Raspberry
Penguins - N3/5/7/9 C1
Hat and Heart - R27/46 E57
Ear Muffs - B23/24
Sequins and Glitter
Pearl Ex Shimmer Spray

Hope you like my wintery forest scene...

Big hugs

Friday 20 September 2019

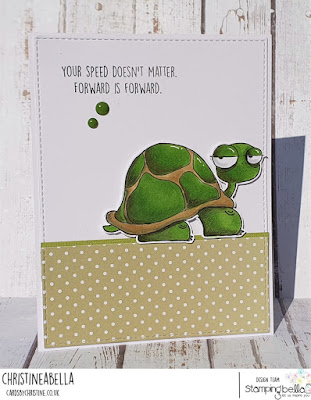
Forward is Forward!


Hi there...

Well - have you got your order in yet?  If you don't know what I'm talking about - it's release day at Stamping Bella - just sayin.....

But it's also Bellarific Friday - and we're sharing cards today made with images from our Stamp of the Month collection - which this month is the Oddballs.  

I loved this turtle from the moment he arrived on the scene, and have been waiting for the right opportunity to colour him up.. and here he is!


Card Info:
Colouring - Copics
Greens - YG17 G94/99 E84
Eyes T1
White Gel Pen
Enamel Dots

Hope you like this fabulous little critter.. plodding along on his journey to the next thing he can find to eat....

Remember to check out the blog later for more Oddballs inspiration - and also pop over to the Sistahood Facebook page - to share and chat all things Bella related.

Happy Bella shopping...
Hugs

Thursday 19 September 2019

More gorgeous Stamping Bella sneak peeks!


Hi Lovelies...

Well I've been bubbling over with excitement as I've got LOTS of cards to show you today....  sneaky peeks of more cards using the fabulous new release at Stamping Bella!

I'm going to get straight on - this is picture heavy so I'll ease off on the words!

My first card uses Polar Bear and Penguin - just sooooo darn cute!


Image - Stamping Bella Polar Bear and Penguin
Colouring - Copics
Penguin - T7, Polar Bear - N0/1/3, Scarf - B21/23/26/28, Tree - YG05/G43 YG17, Shadow - B60, 
Stamping Bella Fa La La Word Die

Onto my next cards - which all feature wonderful Curvy Girls!!!  As a curvy girl myself.....  I LOVE these images!

My first uses Curvy Girl with her Tree... isn't she fabulous???


Image - Stamping Bella Curvy Girl with Tree
Colouring - Copics
Tree - G43/46/85 YG05/17, Dress R46 E57, Hair E42/43/44, Baubles Y32/38


Next we have Curvy Girl Loves to Ski - I decided on a shaker card for this fabulous girlie after fussy cutting her..  


Image - Stamping Bella Curvy Girl Loves to Ski
Sentiment from Stamping Bella Winona Loves Winter
Colouring - Copics
Skier - B21/23/26,  Hair - C5/7/9, - Skin as usual,  Boots and Skis- T0/1/2/3/4/5,


 Now we have Curvy Girl Multi-Tasker - she's soooo in her element relaxing there..  I did a little Bokeh panel in the background for this one...


Image - Stamping Bella Curvy Girl Multi-Tasker
Sentiment - Stamping Bella Smile Word Die
Colouring - Copics
Chair T0/1/2/3/5/7, Cat - C5/7/9, Gown R81/83/85, Book B41/45, Hair C5/7/9, Skin as usual


 And lastly (but certainly not least) we have Curvy Girl with Bubbly..  


Image - Stamping Bella Curvy Girl with Bubbly
Colouring - Copics
Skin as usual, Hair E41/43/44, Reds - R24/27/46, Wine Y00 YG01, Straw T0/1 R27/46, Glass B60/63, Greens YG17 G46/99


All of these wonderful images - and the others we've shown during the week, will be available from Stamping Bella tomorrow - 20 September!!  

Don't forget to pop over to the Stamping Bella Blog and leave a comment to be in with a chance of winning a $25 voucher to spend at the Bella website..  and while you're there you'll see more fabulous inspiration from the Bella Babes.

 Big hugs

Wednesday 18 September 2019

Introducing Bundle Girl.......


Hi there...

I'm so excited to say it's time for me to share my sneak peeks of the wonderful Stamping Bella release due next Monday - 20th September.

Now this lovely girlie is a new character to the Bella fold - but I'm sure she'll be ultra popular..  She is the aptly named Bundle Girl.......  and I'm in love with her!  Oooh and of course, also with her little penguin who's being towed along behind!

I created a blended snowy background for her to walk through... complete with snowdrifts - before fussy cutting both characters to adhere with 3D foam pads.


Card Info:
Dies - MFT Stitched Rectangle, Lawn Fawn Stitched Hillside Borders
Distress Inks for Background - Salty Ocean, Blueprint Sketch, Chipped Sapphire
Colouring - Copics
Girl - Skin - as usual
Coat and Hats - R24/27/46 E57
Scarf, Bobble and Tights - T0/1/2/3
Greens - YG05/17
Penguin - N5/7/9, Y38, 
Mistletoe - G40/43
Snow B60

Hope you like my make today.  If you pop over to the Stamping Bella Blog to see more wonderful inspiration and leave a comment - you could be in with a chance to win an amazing $25 voucher to spend at the Stamping Bella website...  so run... don't walk! 

I'll be back tomorrow with lots more Bella goodies...  You'll LOVE this fabulous release - I promise you!

Big hugs

Tuesday 17 September 2019

Fuzzy Friends


Hi Again..

OK... I fell for these gorgeous little critters as soon as I saw the release post from Mama Elephant...  so I ordered yesterday from Dies to Die For In the UK - received them this morning, and coloured this afternoon!!  How could anyone resist this fab stamp set - and that wonderful forest die?


I did a Distress Ink background using lots of blues - splattering with water and Picket Fence Distress Ink Paint.  I made an extra snow bank too before diecutting the forest - cutting it twice to give extra depth.  I used my B60 Copic pen to give some colour to the snowdrifts..  hopefully making them look more natural.


I tried to give these little bears some extra fuzzy fur texture..  just by dotting rather than flat colouring - I think it worked.


Card Info:
Images and Sentiment - Mama Elephant Fuzzy Hugs
Die - Mama Elephant Forest Cover Plate
Colouring - Copics
Bears - E30/31/33/35 and E40/41/42/43/44
Hat - RV63/66/69 
Jumper - B21/23/24/26/28
Snow B60
Penguins - C3/5/7 and N1 for face and chest
Hat - R24/27/56 and E57
Ear Muffs - B21/23

Hope you love these critters as much as I do....

Hugs

See-Saw


Hi There...

I'm using one of the new September images from All Dressed Up today - this is See Saw (for obvious reasons!)

If you love this image as much as I do... you can get her as a giveway if you go to Kit and Clowder's Facebook page - where you can also get a 20% discount voucher from All Dressed Up...  check it out here -  https://www.facebook.com/groups/kitandclowder/permalink/2249076355220621/  and follow the instructions - it's open until 22 September.


Card Info:
Image - All Dressed Up See-Saw
Die - MFT Stitched Rectangles
Distress Ink Clouds and Grass
Colouring - Copics
Skin - As Usual
Hair - E30/31/33/35
Dress and Hat - V12/15/17
Boots - B21/23
Bird - E31/33
Flowers RV10/11 Y18
See Saw - N3/5

Hope you like my make today.

I'm a little unsure as to whether to keep on with my blogging - or just move totally to Instagram - as things seem to be moving that way.  But I do like to have a record of colours I've used etc.. so I'm still undecided.

Big hugs (to anyone that may still read my blog! LOL)

Sunday 15 September 2019

Pix's Favourites


Hi Lovelies..

Today I decided to do a little masking on my card - using these fabulous little bunnies from Mama Elephant - Pix's Favourites.

I fussy cut masks of all three of these gorgeous little bunnies - then I stamped the centre bunny onto my card, masking it before stamping the other two - so they appear behind the centre bunny.  I then adhered the other two masks over the image and a piece of post it tape for the base, before blending with some Tumbled Glass Distress Ink.


Card Info:
Image - Mama Elephant Pix's Favourites
Sentiment - Clearly Besotted
Die - MFT Stitched Rectangle
Colouring - Copics
Bunnies - T0/1/2/3 - N2/3/5 - E30/31/33
Dresses - R81/83/85, B21/23, V12/15/17
Glitter

I cut a piece of fun foam to mount the panel onto my card base - it's so much easier to use than foam tape.

I was really thrilled how this turned out - I'll be doing more of this CAS style in the near future.. OK it wasn't very of the S (simple) for me - it took me a while!

Hugs

Friday 13 September 2019

Believe in Your Dreams


Hi Peeps

It's time for another Bellarific Friday over at Stamping Bella....  and today I'm using the fabulous Stephanie Loves Ballet - she's soooooo graceful and elegant!

I decided to use some shimmer paste through a stencil to create the glittery stars behind her...  I wish I could capture the sparkle better, but hey ho.. I never seem to manage.  You just have to know it sparkles well in real life!


Card Info:
Die - MFT Stitched Rectangle
Stars Stencil
Glimmer Paste sprinkled with extra glitter
Colouring - Copics
Skin - E000/00/11/04 R20
Hair - E23/27/29
Dress and Shoes - RV63/55/17

I carefully fussy cut the image and adhered her with foam pads so she pops from the card.  

Hope you like my make today, and that you'll pop over to the Stamping Bella Blog to see what the other Babes have come up with to inspire.  You can also check out the Sistahood Facebook page to chat and share all things Bella related!
Have a lovely weekend all...
Hugs

Monday 9 September 2019

Celebrate!


Hi Lovelies..

Well, as my card says, I'm celebrating!!  What am I celebrating??  Well I've discovered Press'n'Seal - which is going to revolutionise my die-cutting!  It enables the use of the negative as well as the positive of any die.  YAYY!!!

So - to explain further...  I bought the fabulous new All The Stars Cover Plate from MFT last week.....  which is a stunning cover plate that cuts all those fabulous stars from a panel.  Then this is where the magic happens!  When the panel is removed from the die...  most (if not all) of the stars stay where they were cut until you pop them out... yes?  So just pop  back into the panel any that did come away..... THEN...  take a piece of Press'n'Seal..  lay over the  front side of the diecut panel pressing down firmly - particularly where the stars are - then slowly peel the rectangular die-cut away - leaving all the stars in perfect position to use!  All I did was use small foam pads on the back of the stars while they were on the Peel'n'Stick, before lifting the film and pressing the stars down onto my card.  The Peel 'n' Stick can then be peeled away causing no damage to the stars or any texture/paint you've given them.   To get the idea better, as I said in my last post - you need to look at Laurie Willison from Soapbox Creations in her video HERE..  


Before all of the above, I did some Distress Oxide blending onto a 4.25 x 5.5 inch piece of Bristol Smooth cardstock.. then lightly splattering water to lift some of the colour.  I then sprayed Pearl Ex mixed with water for a shimmer effect, and also Distress Ink Picket Fence Paint Spray.  So the stars have a graduated colour effect... and I used the left over piece of blended card behind the sentiment (cut from gold mirri card) so all matches.


 Card Info:
Dies - MFT All The Stars Cover Plate, MFT Celebrate word die
Distress Oxide Ink Pads - Picked Raspberry, Worn Lipstick, Mustard Seed
Gold Mirri Card
Pearl Ex and DI Picket Fence Spray

You can see the negative of the cover plate in the photos..  that'll be used soon!

Can you tell I'm excited??? LOL!

Hugs

Saturday 7 September 2019

Mwah from Beret Girl!


Hi Lovelies

It's new release day over at All Dressed Up - and I'm sharing a card I made with the gorgeous Beret Girl.  

I decided to go for pastel pinks (and a touch of blue) for this girlie - she looks so fashionable - I wish I had legs like that!

I blended some Distress Oxides onto card then sprayed with Pearl Ex before getting out a cover plate die to use.

Now... I bought myself some of the magic that is Press 'n' Seal this week... wow - it's wonderful stuff!  It enables crafters to use the bits you'd normally throw away from a diecut - so, I used the negative of a cover plate die.  As it's slightly tacky, it holds all of the negatives exactly as they come from the die - enabling you to add glue or foam pads before adhering to a card base.  OK - I've not explained it well....  I've got to give credit to lovely Laurie Willison from Soapbox Creations who has a wonderful video HERE that'll show you far better than I can explain.  Suffice to say it's brilliant stuff that will open up a whole new crafting world!


Card Info:
Dies - Sunny Studio Frilly Frames, Stamping Bella Mwah Word Die
Distress Oxides Worn Lipstick and Spun Sugar
Colouring - Copics
Skin as usual
Hair - E50/51/53/55
Dress, Hat and Shoes - RV10/11/13 B00/01
Glitter, Gems and Sequins
Glossy Accents


I diecut the word die three times and adhered them together, before covering in Glossy Accents to make the letters pop.

Hope you like my candy striped pink creation... I'm back in my happy place!

Hugs 

Friday 6 September 2019

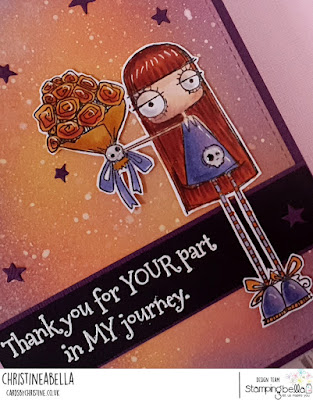
Oddball Bouquet


Hi There...

Yes... it's time for another Bellarific Friday! I swear these Fridays come round more often than weekly... but hey... I'm not complaining as I get to colour Stamping Bella goodies!!

Today we're highlighting the Stamp of the Month for September - which this time is Oddball Bouquet - you can buy her with 25% discount till the end of this month!

To create the background, I firstly blended the Distress Oxides onto Bristol Smooth watercolour card, then sprayed with water to lift some of the colour. I then sprayed with Pearl Ex mixed with water to give a shimmer (which is sooo difficult to capture on photos but looks fab in real life, then lastly with Distress Ink Picket Fence Paint.

I fussy cut the image so that I could make her stand out from the card on foam pads.


Card Info:
Dies - MFT Stitched Rectangle, Sizzix Swirling Stars
Background - Distress Oxide Mustard Seed, Ripe Persimmon, Wilted Violet
Colouring - Copics
Skin as usual
Hair - YR14/18 E08/18
Flowers - Y38 YR07/24/27
Dress and Shoes - BV11/13/17
Skulls - T0/1
Glossy Accents

I decided to make my photograph dark and moody to suit this young lady..  (ok... really I'm struggling with my camera/lighting!)

Hope you like...

Hugs

Wednesday 4 September 2019

Happy Birthday!


Hi Peeps..

Today I'm here with a card that didn't involve my Copics! LOL!  

Firstly I did some Distress Oxide blending with Picked Raspberry, Ripe Persimmon, and Mustard Seed.. then I used Picket Fence through the MFT Circle Stencil to give the Bokeh effect.  After that I sprayed with some PearlEx mixed with water to give the glimmer, then with Distress Ink Picket Fence spray to give the white dots.

I diecut the Happy word from Whimsy Stamps from some gold mirri card- and added the 'birthday' from the MFT Essential Sentiments - stamping it in Versamark on black card, and heat embossing with white embossing powder.

Lastly I randomly added some gold stars cut with the Sizzix Swirling Stars die before mounting the whole panel on gold card - then I called it done.  It's not the best card for photography - but you get the idea!

Hope you like...
Hugs