Hi Lovelies..
Today, my card is one I've wanted to make for ages - I've had the die set quite a while, but I knew it would take a bit of organisation and lots of die-cutting etc to get done.... which put me off starting it for a little bit!
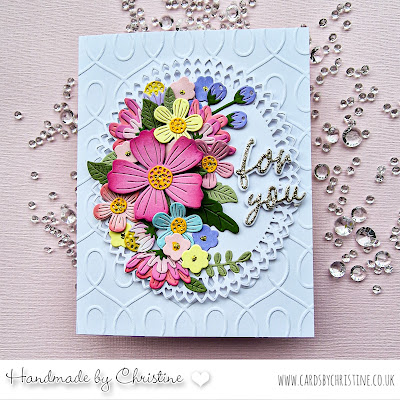
Anyways... I got around to it this weekend... and I was right! My desk looked like a tip by the time I'd finished with lots of little bits of coloured card etc! It's a large die set, so firstly, I cut a magnetic sheet to keep all the dies in their place while I used them - and hey - I didn't lose one! I used Distress Inks onto white card for some of the colours, and used pre-coloured card for others. I laid all the flowers onto a diecut oval and adhered them slowly until I was happy with their placement. I added the oval to a piece of embossed cardstock then onto my card base, and lastly, added a small sentiment that I'd die cut from gold glitter cardstock, with a white shadow. Finally, I added a touch of gold glitter glue on to the centres of the flowers.... better seen in real life.
Card Info:
Floral Die Set - Spellbinders Be Bold Blooms
Oval Die - Spellbinders Oval Bliss
Embossing Folder - Spellbinders Loops Embossing Folder
Sentiment - Altenew Sweet Sentiments Dies
Gold Glitter Card and Gold Glitter Glue
I've got to say, it took me a fair amount of time to complete this card - both for the design thinking and then the making, but I didn't sit at it for long each time - life was busy, so my card making takes a back seat!
And now I've seen what it looks like finished, I know I'll make more! I've got a lot of flowers and leaves left still to use, so another one at least, will be easy!
Hope you like...
Hugs


Oh Christine....your card is lovely! THE WORK! But the result is stunning! I can only image what it looks like in person! YOU NAILED IT!
ReplyDeleteWhat a lovely card. Beautiful. Thank you for sharing it.
ReplyDelete